Lightning Flow
In the Lightning flow, Locofy.ai leverages the power of AI to automate and elevate the design-to-code process and enable you to ship products 10x faster.
This advanced flow ensures a seamless transition from your Figma and Penpot designs to developer-friendly, extensible front-end code.
Project Creation
You can start by creating a project. To do so, follow these steps:
- Click on "Select project" field.
- Click on "Create new" & enter your project name.
- Select your framework from the following options:
- Web: React, Next.js, HTML/CSS, Gatsby, Vue, Angular
- Mobile: Flutter, React Native
- Select your preferred UI library.
- React, Next.js, Gatsby: Material UI, Chakra UI, Ant Design, and Bootstrap
- Vue: Vuetify
- React Native: React Native Paper, UI Kitten
- Flutter: Material UI
- (Optional) If you have existing code components for your web projects, you can map them to respective Figma Components. You can read more here (opens in a new tab).

Pre-checks
Before diving into the conversion process, Locofy performs a set of intelligent pre-checks to ensure your designs are ready for code generation and to catch potential issues early on.
Here’s what gets checked:
-
Prototype Connections (opens in a new tab): Locofy reads and understands your Figma prototypes. It validates if actions and interactions are wired up properly so that transitions, navigations, and interactive behaviors can be auto-mapped to code.
-
Design Changes (opens in a new tab): Whether you’re starting fresh or revisiting a project, Locofy supports iterative development. It checks for design updates and allows you to sync changes, saving time while preserving previous work.
-
Multiple Breakpoints (opens in a new tab): Locofy automatically detects and maps your breakpoint frames like desktop, tablet, and mobile in Figma. This ensures that your website looks consistent across devices, exactly as you have designed.
-
Custom Fonts (opens in a new tab): Locofy scans your design for any custom fonts. If any are used, it prompts you to ensure they’re correctly imported or made available, so your final output mirrors your designs with pixel perfection.
Flow
The Lightning flow follows a clear set of steps, from optimising your design to generating clean, responsive, and modular code. Once code is generated, you can further refine and enhance your UI using Edit Mode and Agent Mode before syncing it to Builder or GitHub.
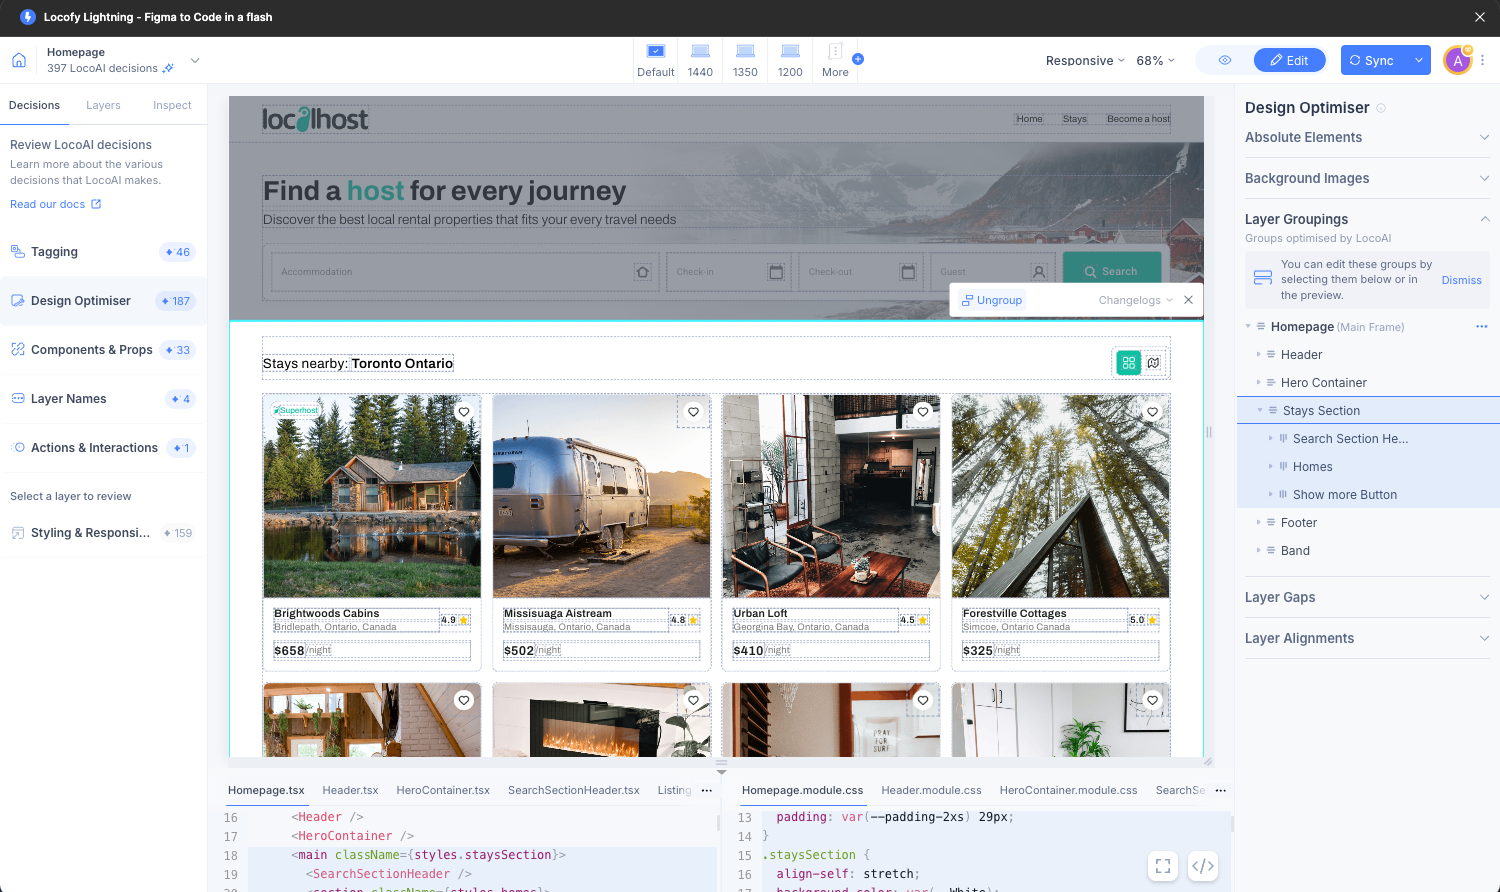
Design Optimiser
Design Optimiser optimises your design by automatically removing unnecessary frames, intelligently grouping items, and identifying inconsistent gaps and alignments making it easier to apply flex and grid based layouts to your web apps.
This automated process is honed through extensive training on millions of diverse designs, ensuring optimal structural enhancements for code generation.
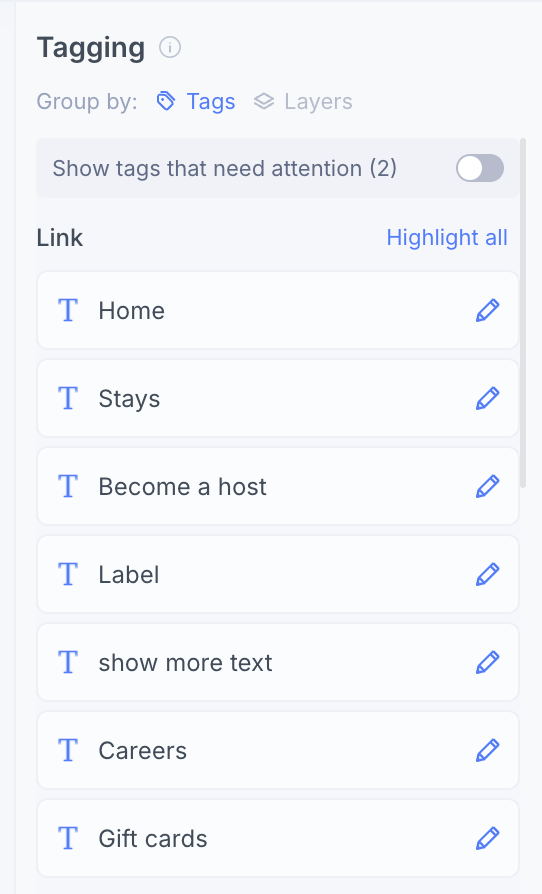
Tagging
With the Tagging feature, LocoAI converts static design elements into interactive elements such as buttons, inputs, and forms.
It can also inherit properties from your design to generate relevant placeholders & onClick actions.
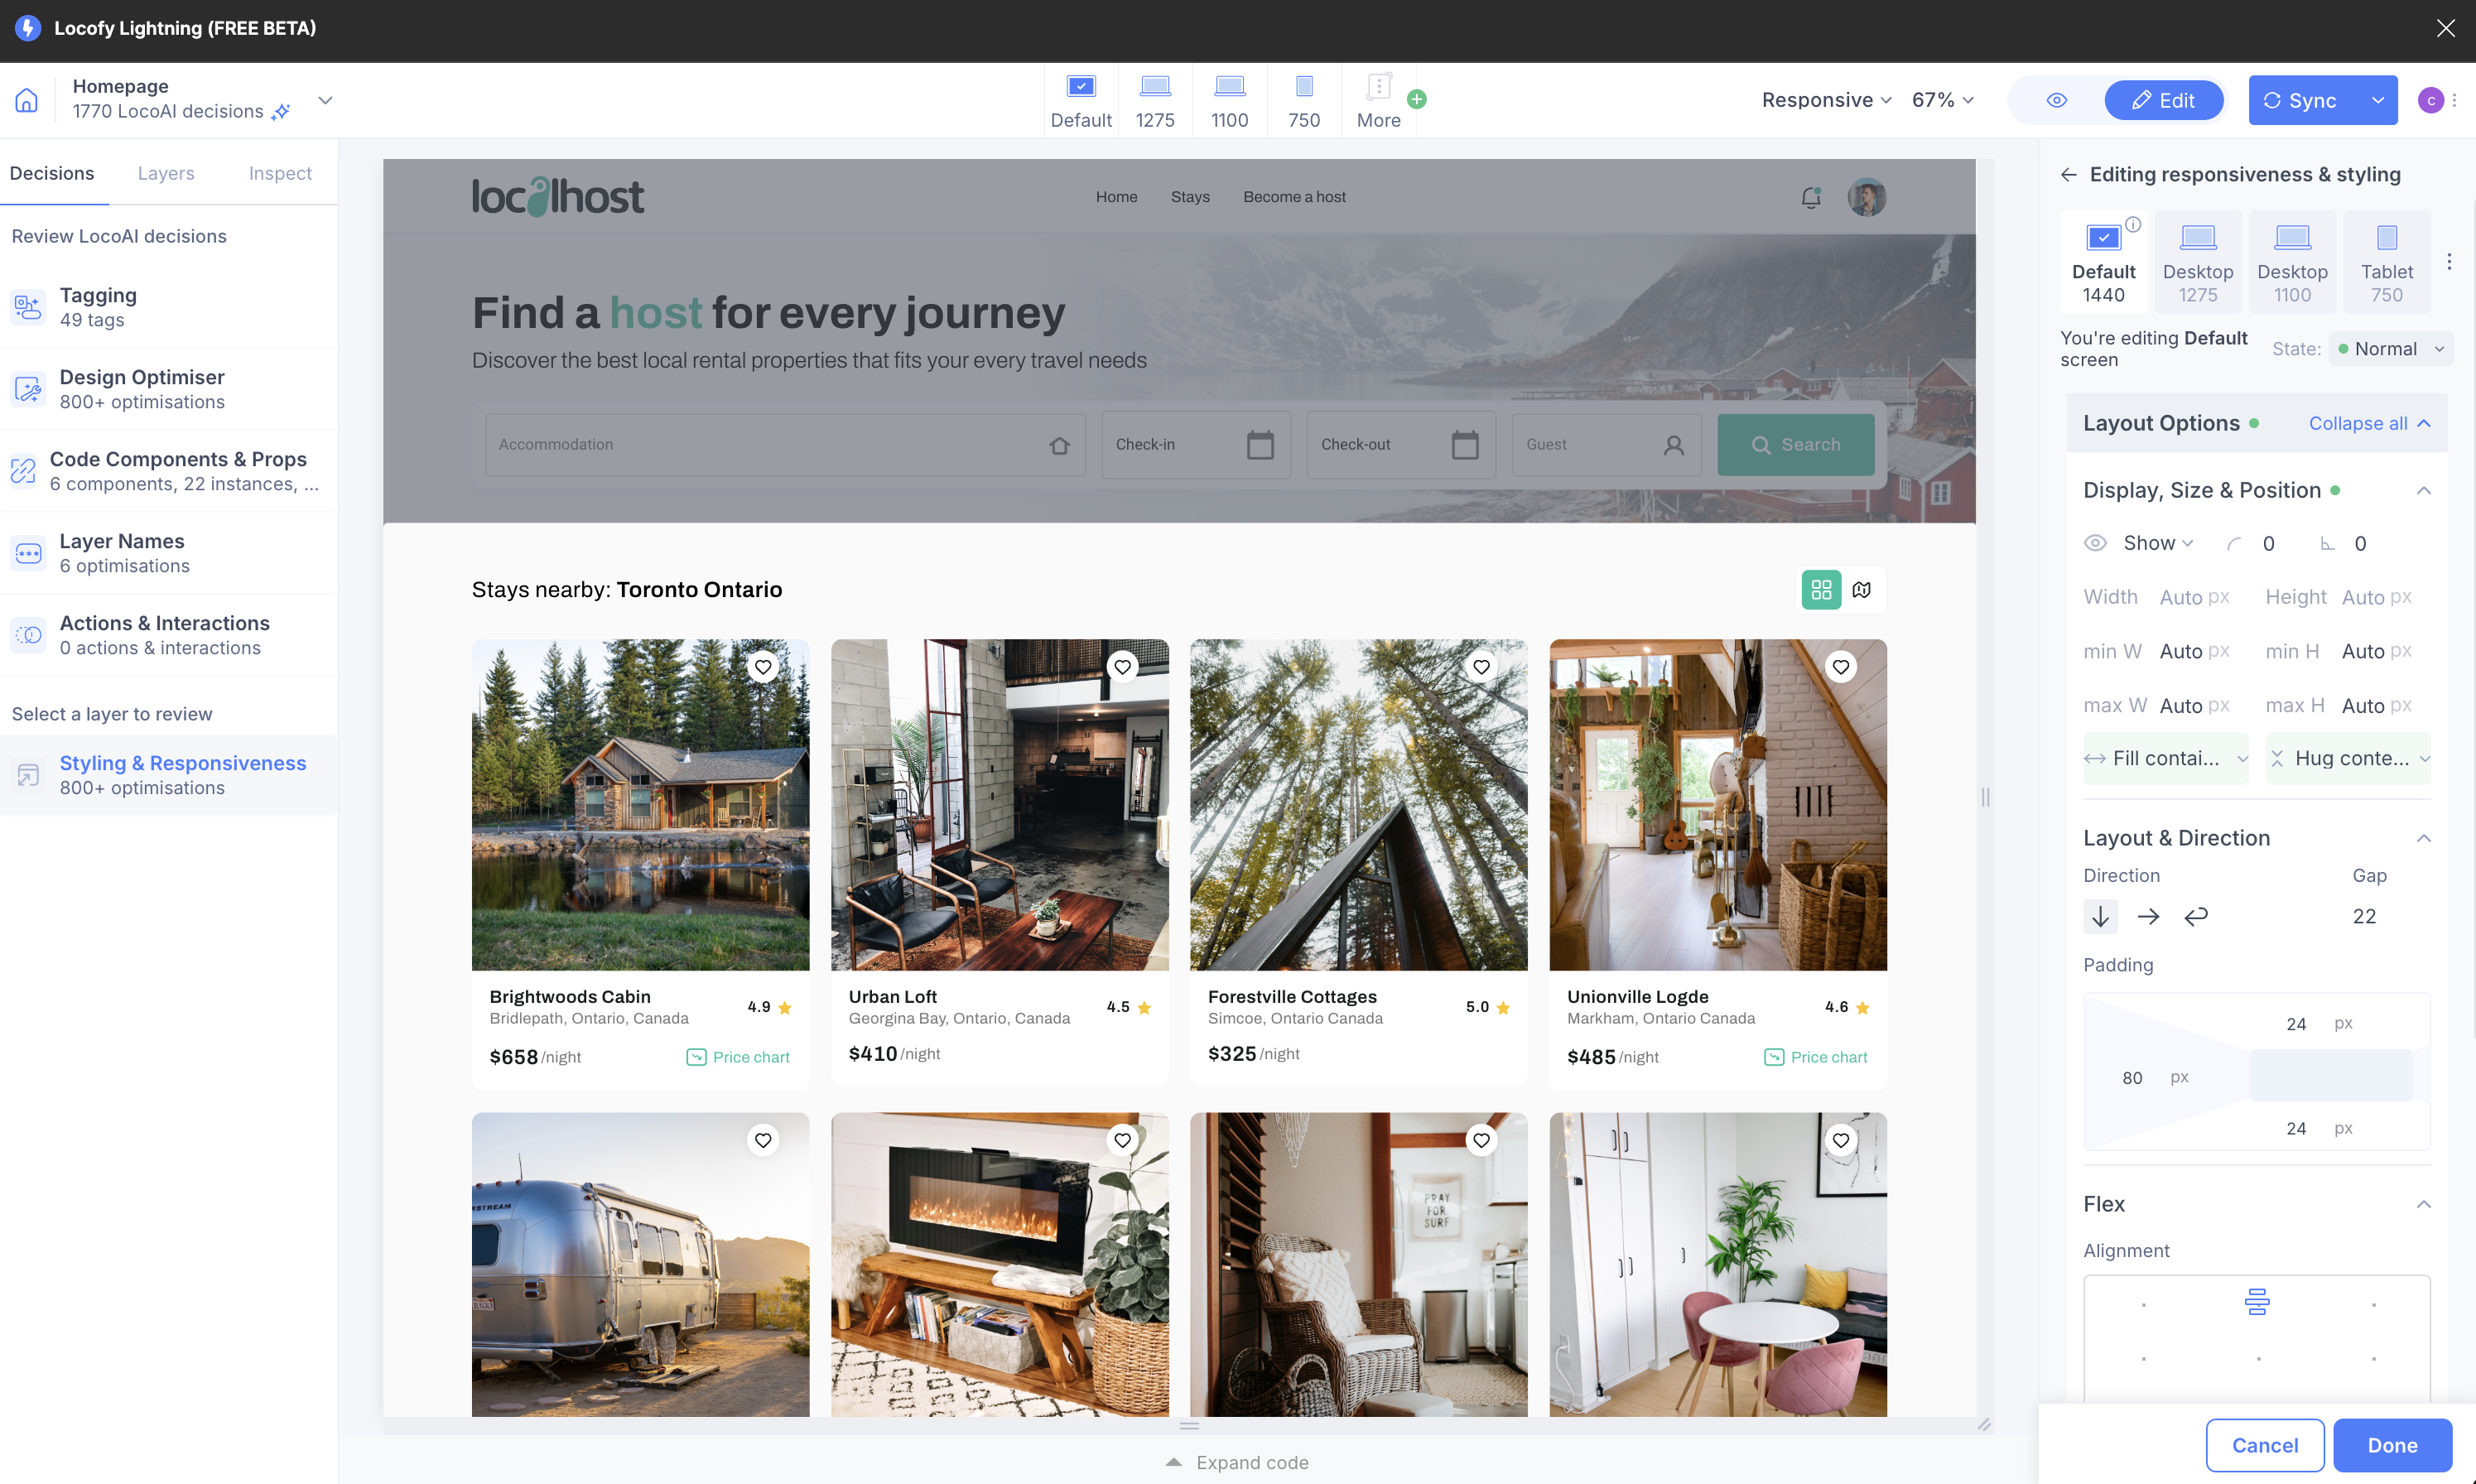
Styling & Responsiveness
In this step, LocoAI scans through your design files and applies styling & layout to your elements across various media queries so your designs can adapt to different screen sizes.
It applies CSS grids, flex, relative positioning, and other relevant properties for responsiveness.
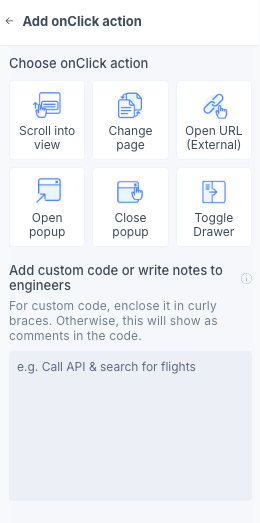
Actions & Interactions
Locofy detects interactions from your Figma prototypes, such as onClick actions, and converts them into functional code. You can also add & edit actions directly within the plugin to define navigation, toggle drawers, open popups and other such behaviors.
You can also add custom code or write notes to engineers.
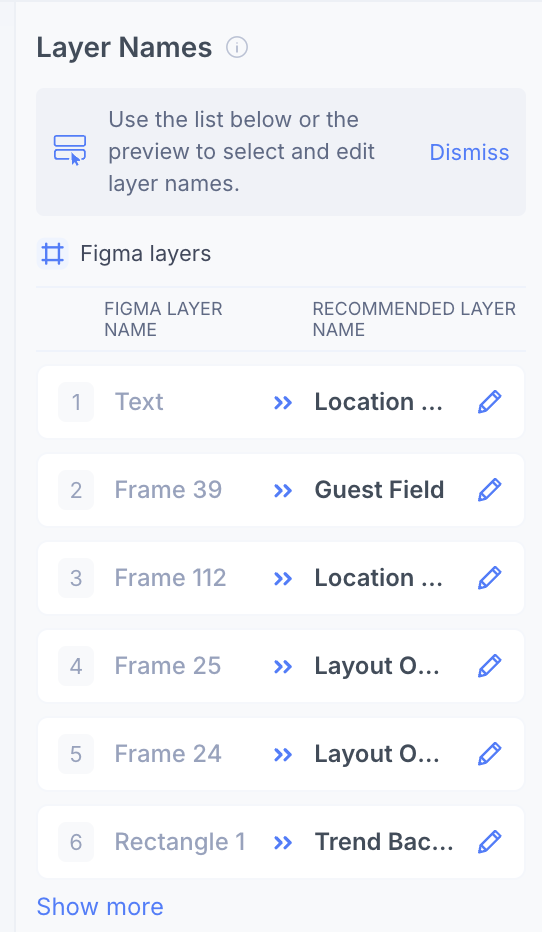
Layer Names
Locofy automatically generates clean and developer-friendly names for your design layers & these names are reflected across the generated components, props, and CSS classes. This improves readability and makes the code easier to extend. For example, a button might be named LoginButton instead of Frame 23.
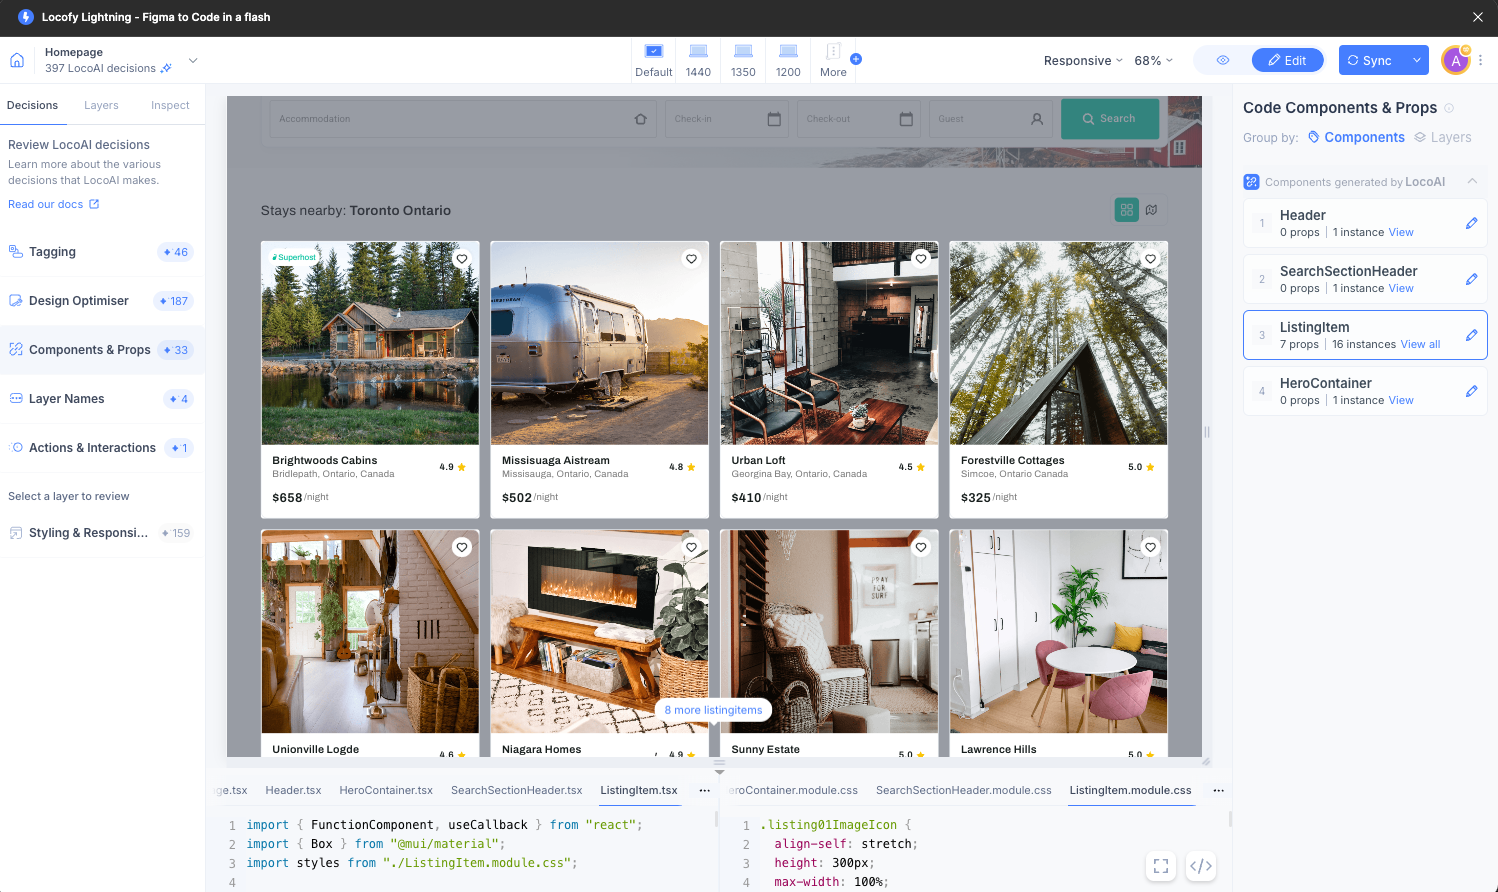
Code Components & Props
In the final step, LocoAI splits the code into reusable components with props. This helps create a scalable codebase that’s easier to maintain and extend for both web and mobile apps.
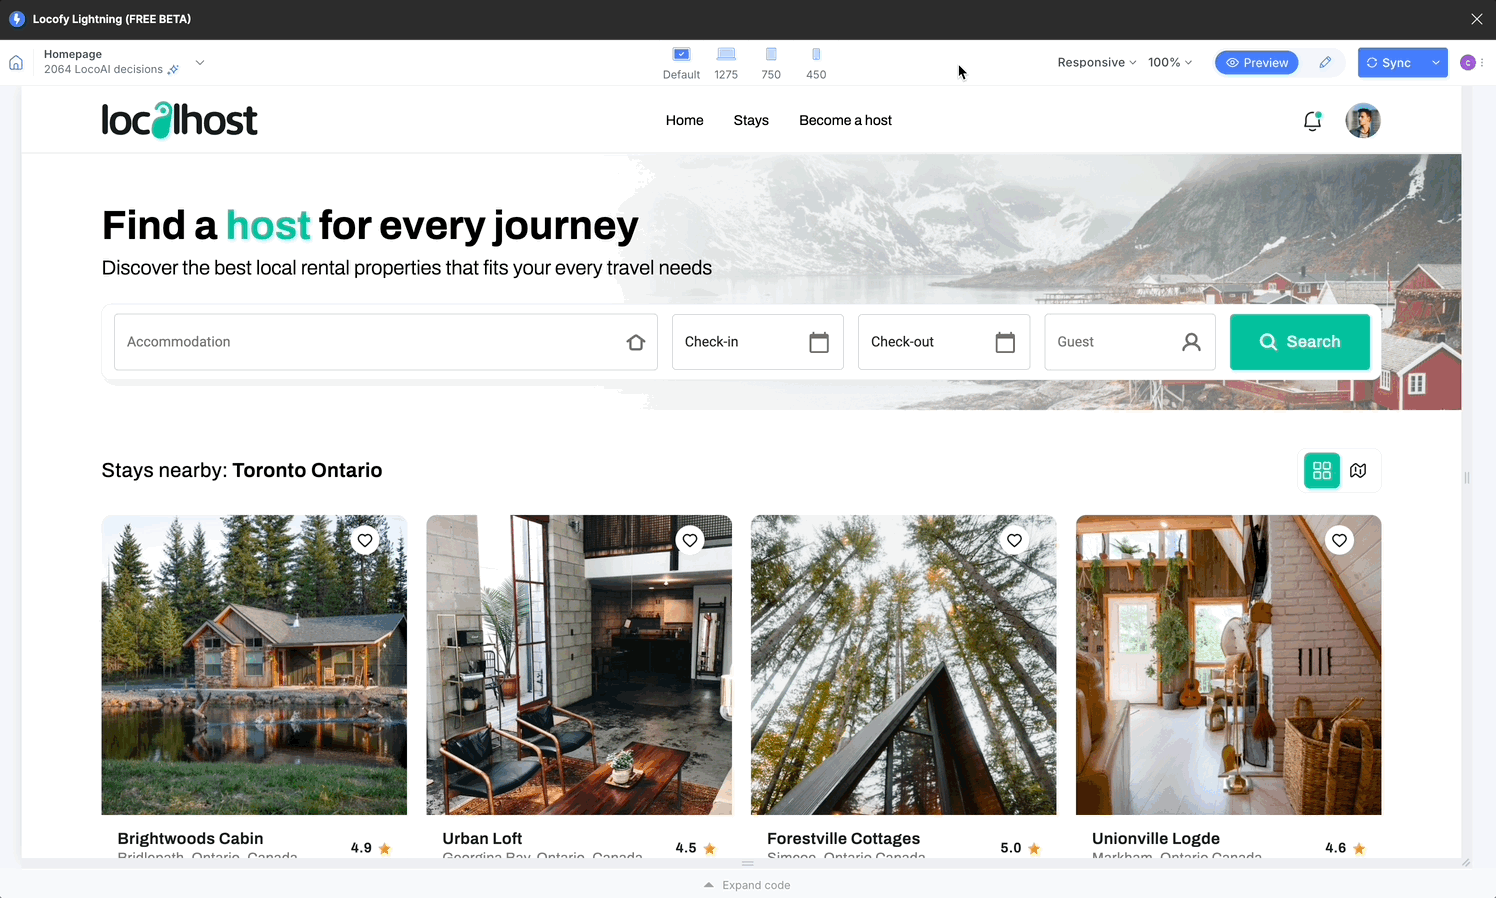
Edit Mode
After generating code with Lightning, you can review and refine LocoAI’s decisions by switching to Edit Mode using the Edit button in the top toolbar.
Edit Mode lets you improve your generated UI before syncing it to Builder or GitHub. It offers two ways to make changes:
- Visual Mode — make edits using Locofy’s existing visual interface
- Agent Mode — enhance your UI using prompts, without manually editing code
You can switch between these modes at any time depending on how you prefer to work.
Visual Mode
Visual Mode is Locofy’s original editing interface. It gives you direct, visual control over how your design is translated into code.
In Visual Mode, you’ll find the following tabs on the left panel:
-
Decisions: View all decisions made by LocoAI, grouped by areas such as tagging, components, actions, and responsiveness.
-
Layers: Select individual layers to inspect or override specific decisions applied to them.
-
Inspect: View the CSS properties and styles applied to selected elements (available for web frameworks).
Visual Mode is ideal when you want precise control over individual elements or need to review how specific parts of your design were interpreted.
Agent Mode
Agent Mode provides a prompt-based interface that allows you to refine and enhance your generated UI using natural language.
With Agent Mode, you can:
- Add accessibility improvements
- Introduce light and dark themes
- Improve responsiveness across breakpoints
- Add internationalisation support
- Apply animations and interaction enhancements
Agent Mode works on top of your generated code, allowing you to make higher-level changes without diving into manual edits. It’s best suited for iterative improvements and larger UI refinements.
You can read more about Agent Mode here (opens in a new tab).
Sync
After converting your designs to code using Lightning, you can sync your project in one of the following ways, depending on your workflow and preferences:
-
Sync to Builder (opens in a new tab): Sync your project to Locofy Builder to continue refining your UI using Agent Mode (opens in a new tab) on live, running code, configure code settings, review folder structure, collaborate with your team, and share interactive prototypes.
-
Sync to GitHub (opens in a new tab): Push the latest code output directly to your GitHub repository.
-
Iterate with Locofy MCP (opens in a new tab): Easily pull, refine, and extend Locofy-generated code in AI-powered editors like Cursor, Windsurf, and Claude Desktop using simple natural language prompts.
