Working with Tables
Learn how to create tables using the Table tag.
Tagging your UI elements
-
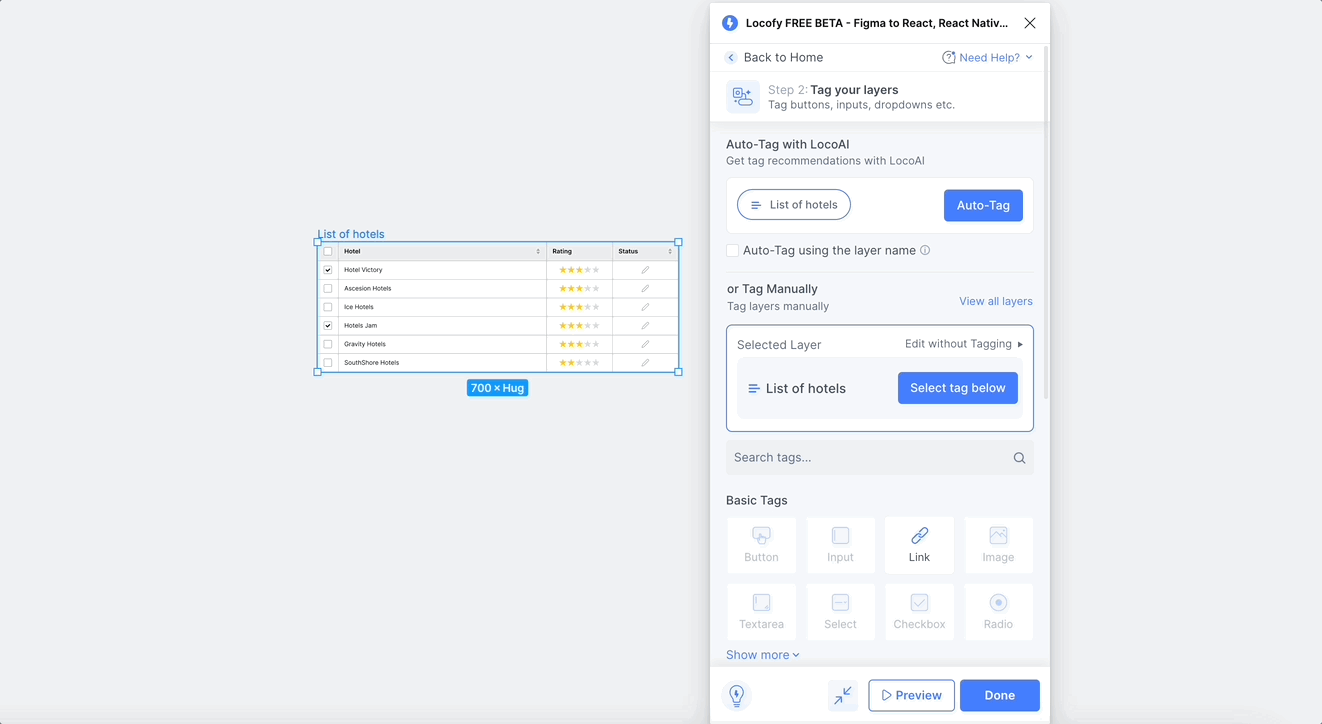
Select the parent container containing the items that you want in your table.
-
Next, go to Step 2: Tag interactive elements on the Locofy.ai plugin.
-
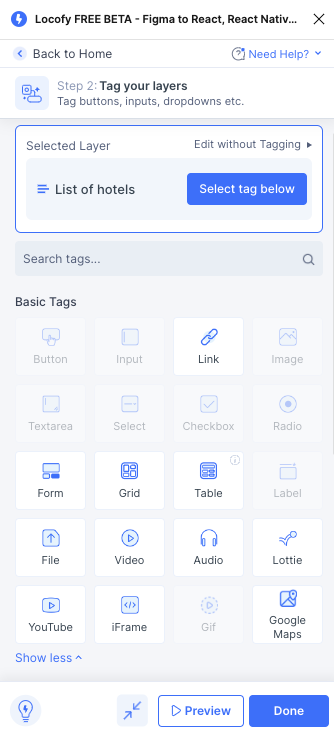
Select the Table tag.
-
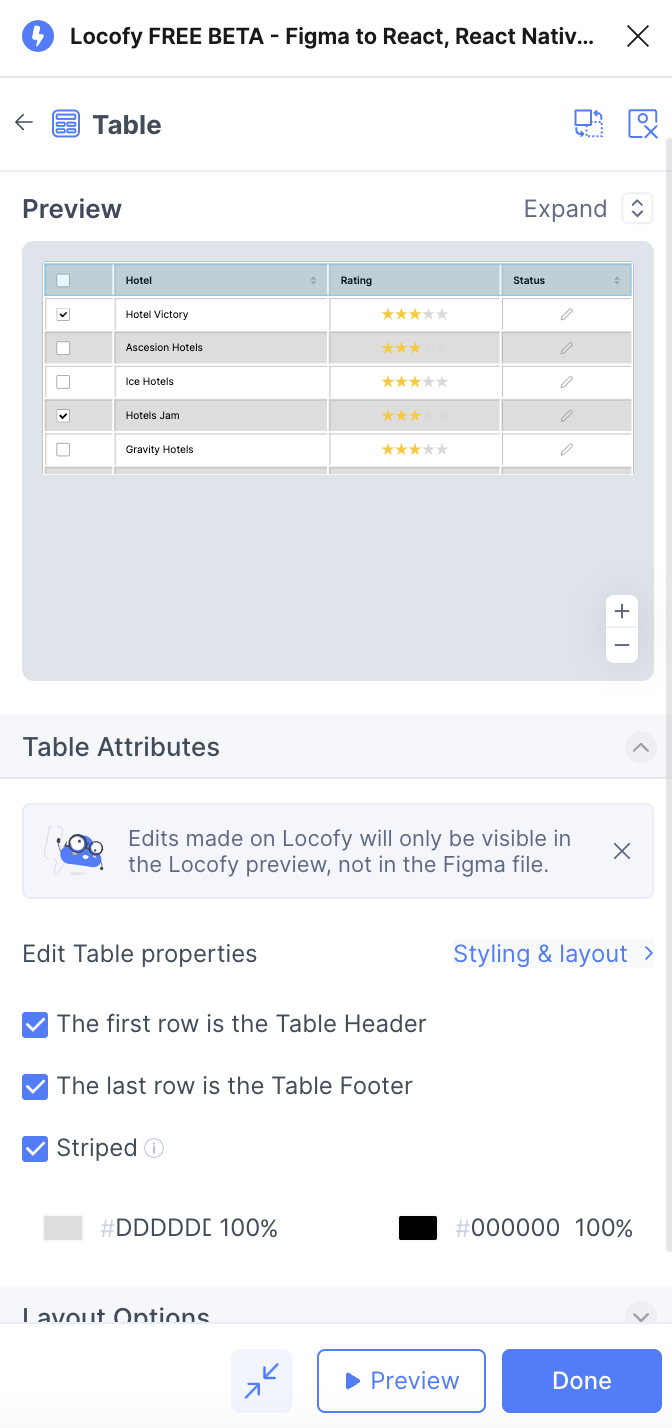
Hit the Preview button to view the table in action.
Customise Table Attributes
You can customise the table properties and set the table header & footer as well as have striped rows.

Layout Options
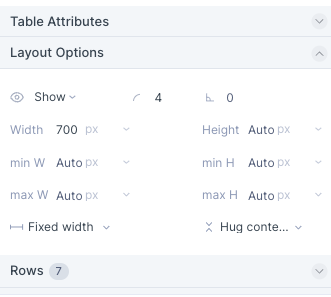
Just like the Layout options present in the Step 3 of the plugin, you can choose to hide the component, set a border radius, and also adjust its width and height.
Rows
Locofy.ai automatically detects the rows present in your table. You can edit properties of each row.
-
You can click the edit button on any of the row to modify its layout properties.
-
Once you click the button, you can now choose the row type. The row can be the header, body or footer.
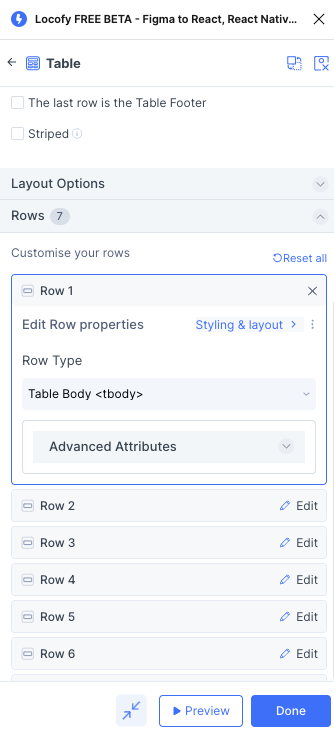
- You can click on Styling & layout button to customise the styling based on different breakpoints. You can also apply advanced attributes to each row.
Cells
Each row has multiple cells. With Locofy.ai, you can customise each of these calls.
-
You can click the edit button on a cell to start customising its properties.
-
Once you click the button, you can now edit the column and row spans.
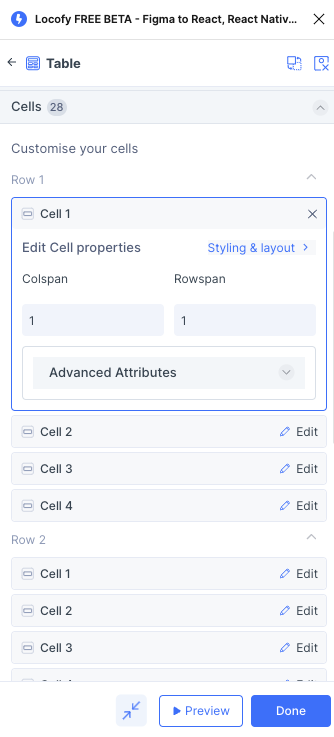
- You can click on Styling & layout button to customise the styling based on different breakpoints. You can also apply advanced attributes to each row.
Advanced Attributes
You can add an ID attribute to the table as well as any custom attribute to improve accessibility, SEO, etc.