Design Optimiser
The first step Locofy.ai takes in the Lightning flow is optimising your designs. Using the Design Optimiser feature, we apply best practices to your Figma designs for cleaner, more responsive code
Design Optimiser reviews and optimises different elements of your design namely:
-
Absolute Elements
-
Background Images
-
Layer Groupings
-
Layer gaps
-
Layer Alignments
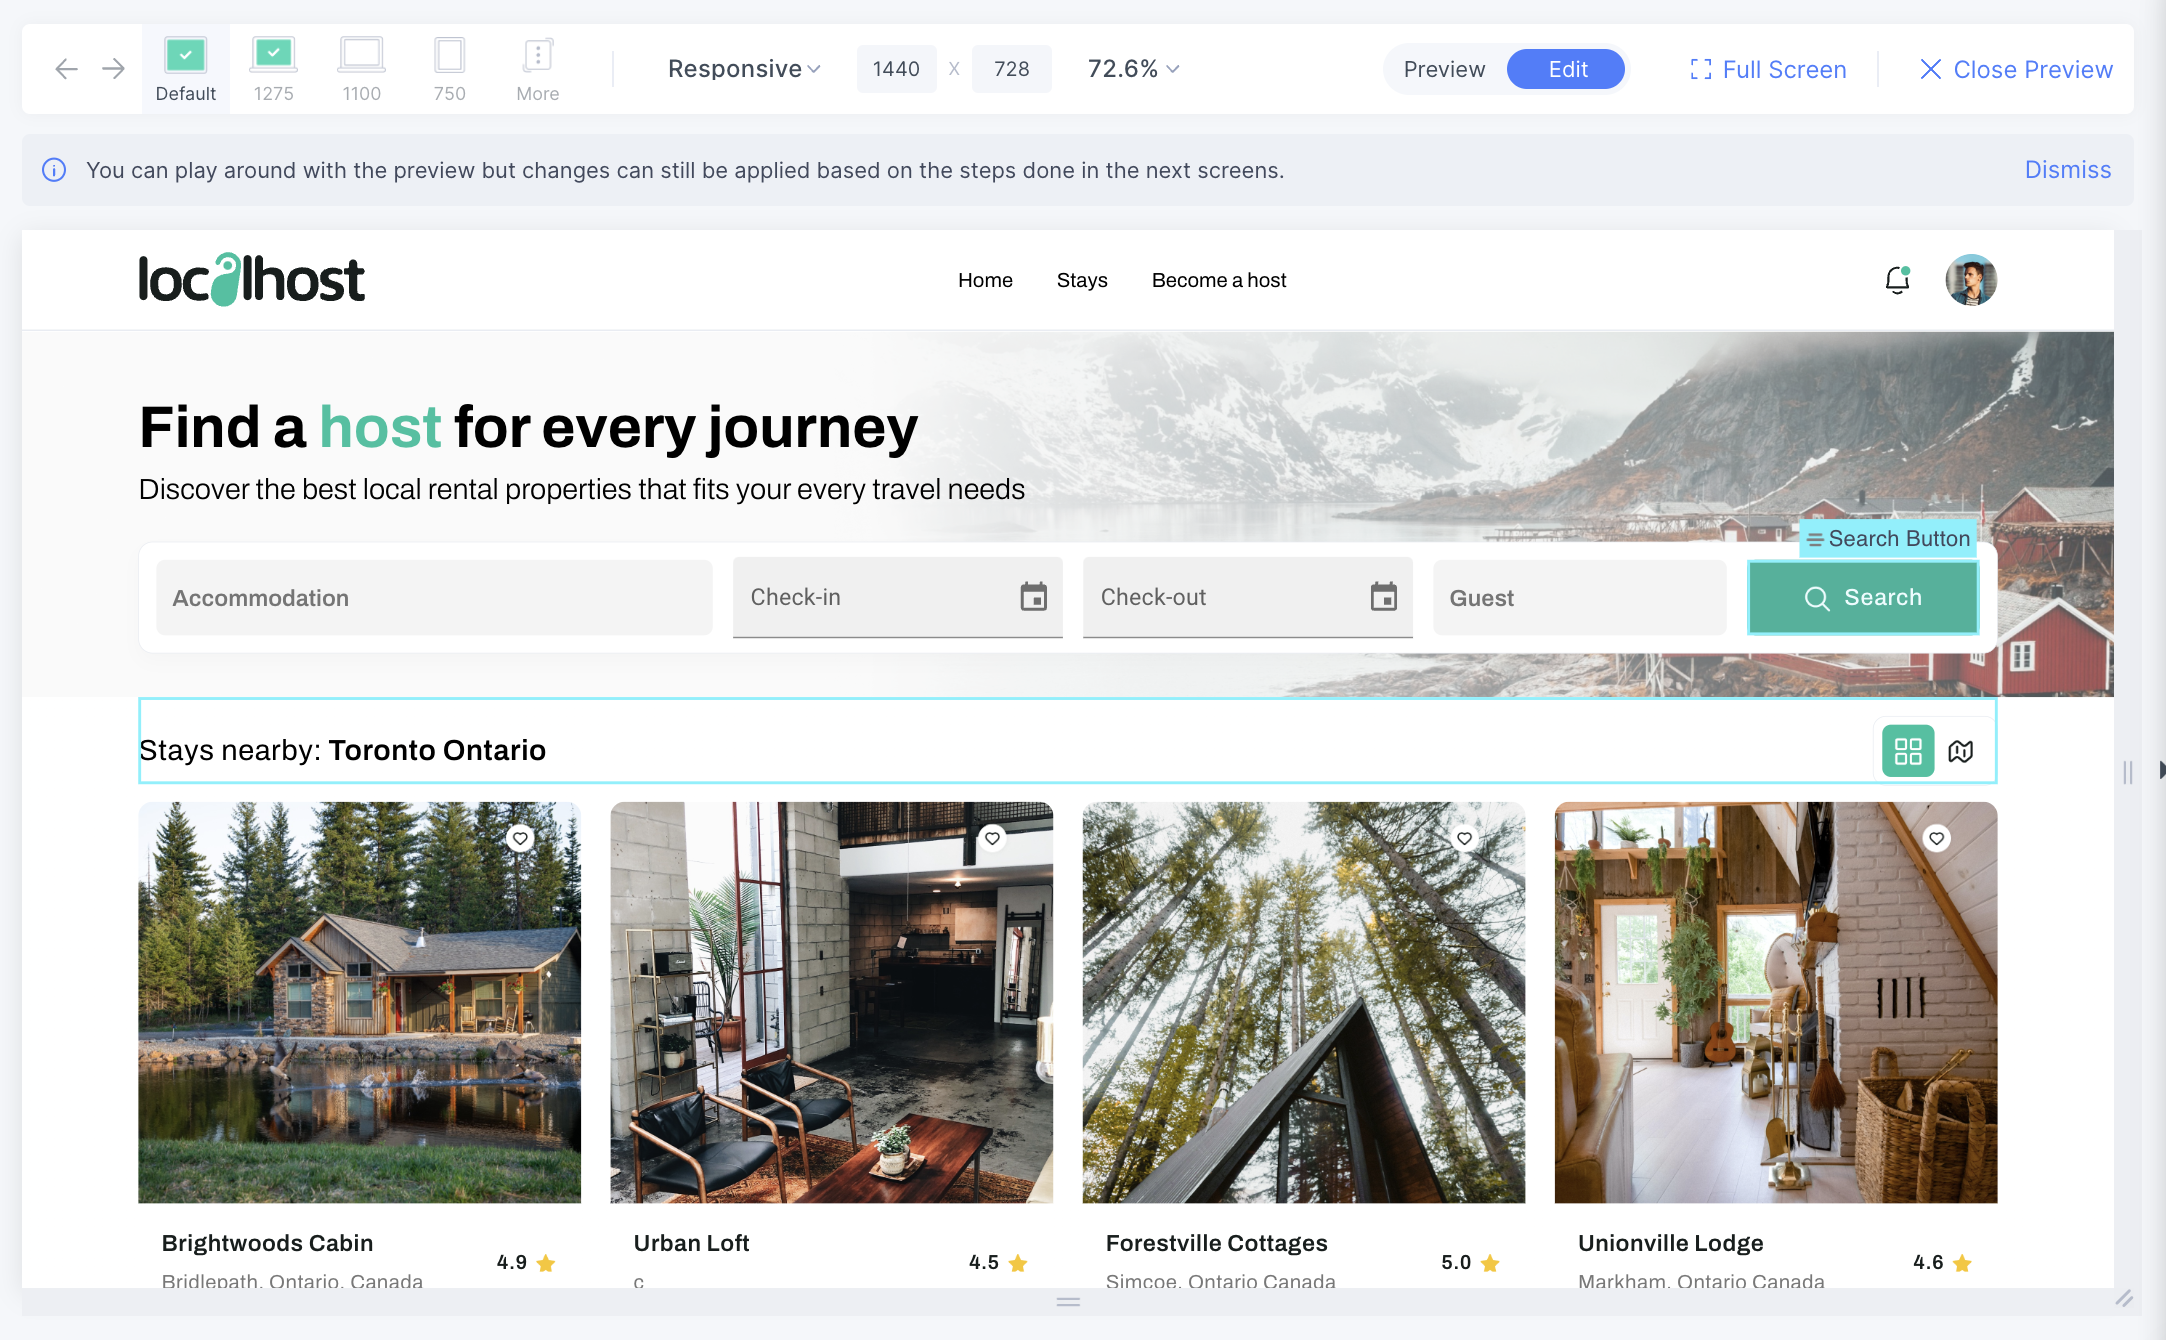
Select and Edit in Preview
You can select the element you wish to edit directly from the preview.
- Click the 'Edit' tab on top of the preview window.

- You can now click the element in preview that you wish to edit. You can also hover over the element to see their name.
Once the item is selected, you can review & edit the decisions LocoAI made, present on the right panel, with regards to the selected element.
Absolute Elements
Elements such as floating elements, popups, menus, and any background image effects should have absolute positioning relative to their parent container. Absolute position allows these elements to have precise placement, regardless of surrounding elements.
We apply the optimisations starting with absolute elements. You can see a list of absolute elements that we have optimised as well as edit them by clicking on the edit button.
Once you click on the edit button, you will find three options: Set as Not Absolute, Change Parent, and Edit Z-Index.
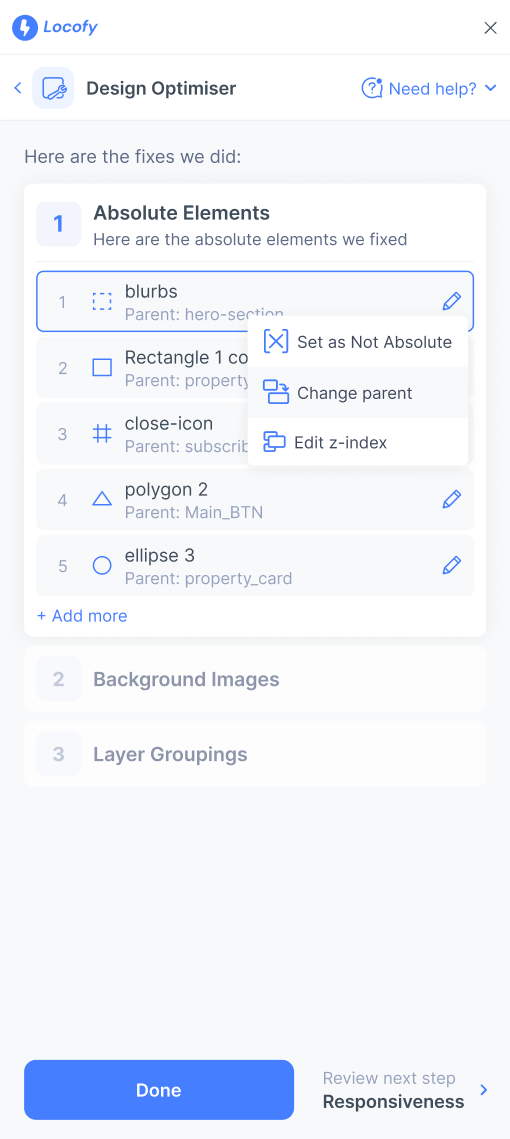
Set as Not Absolute
In cases where you want the element to adjust according the elements in the same group, you can remove the absolute positioning for them.
You can change absolute position status and add to the layout/groups. Our algorithm will re-run to create the appropriate grouping for that section.
- Click the edit button next to the element.
- Select the "Set as Not Absolute" option.
Change Parent
The parent of an absolutely positioned element plays a crucial role in determining the positioning context for the absolutely positioned element.
For example, a floating delete button on a card should have the card's outermost layer as its parent so when the card changes position, the button also moves along with card.
You can change the parent the element is absolute to.
- Select the "Change parent" option after clicking the edit button.
- Use the preview to select the correct parent for this element.
- Click the confirm button once you have selected the parent element.
Edit Z-Index
You can change the z-index value as well.
- Select the "Edit z-index" option after clicking the edit button.
- You will find an input field where you can edit the value of
z-index. - Click the save button once you entered the value.
You can input the values manually.

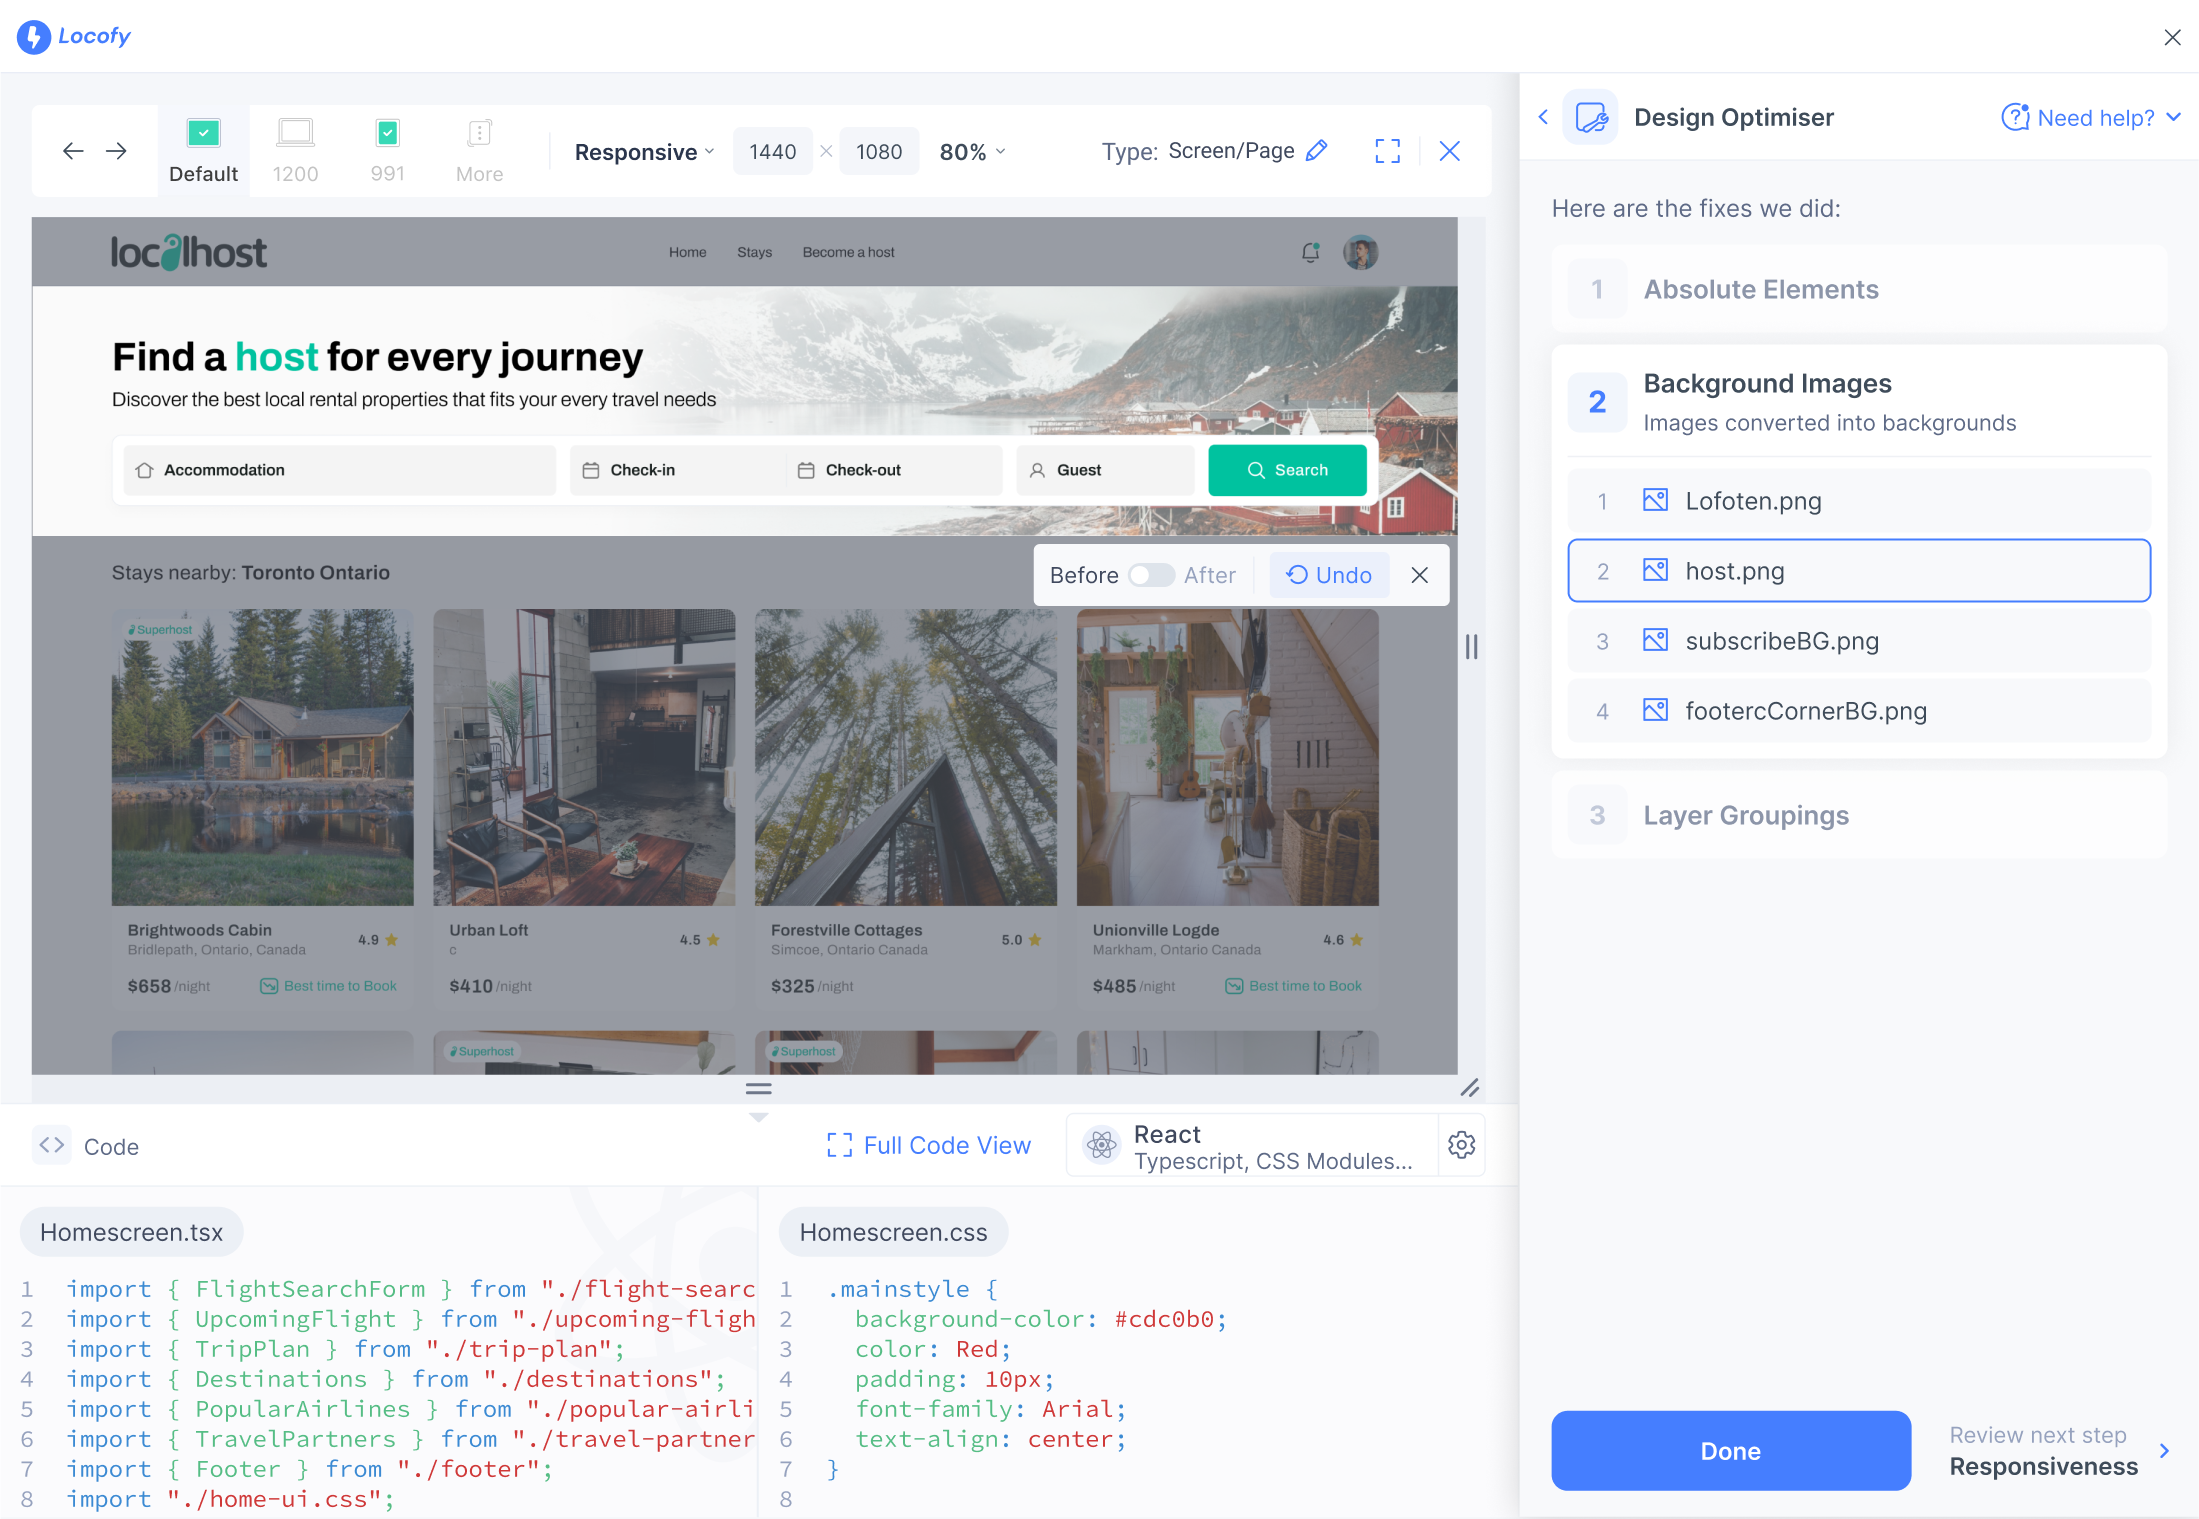
Background Images
When creating elements like buttons, cards, and more, it is common to use rectangles or images to act as the background for actual content. This is convenient during the design process, however it can lead to additional layers and additional lines of code.
To tackle this, our LocoAI detects images that needs to be converted into background images and uses them as such. We apply background-image CSS property to apply these images as background.
View in Preview
You can view these images in preview by hovering over the element and clicking on "View in Preview".
Undo changes
You can view the before and after result of accepting or removing the change made by LocoAI where images are converted into background images.
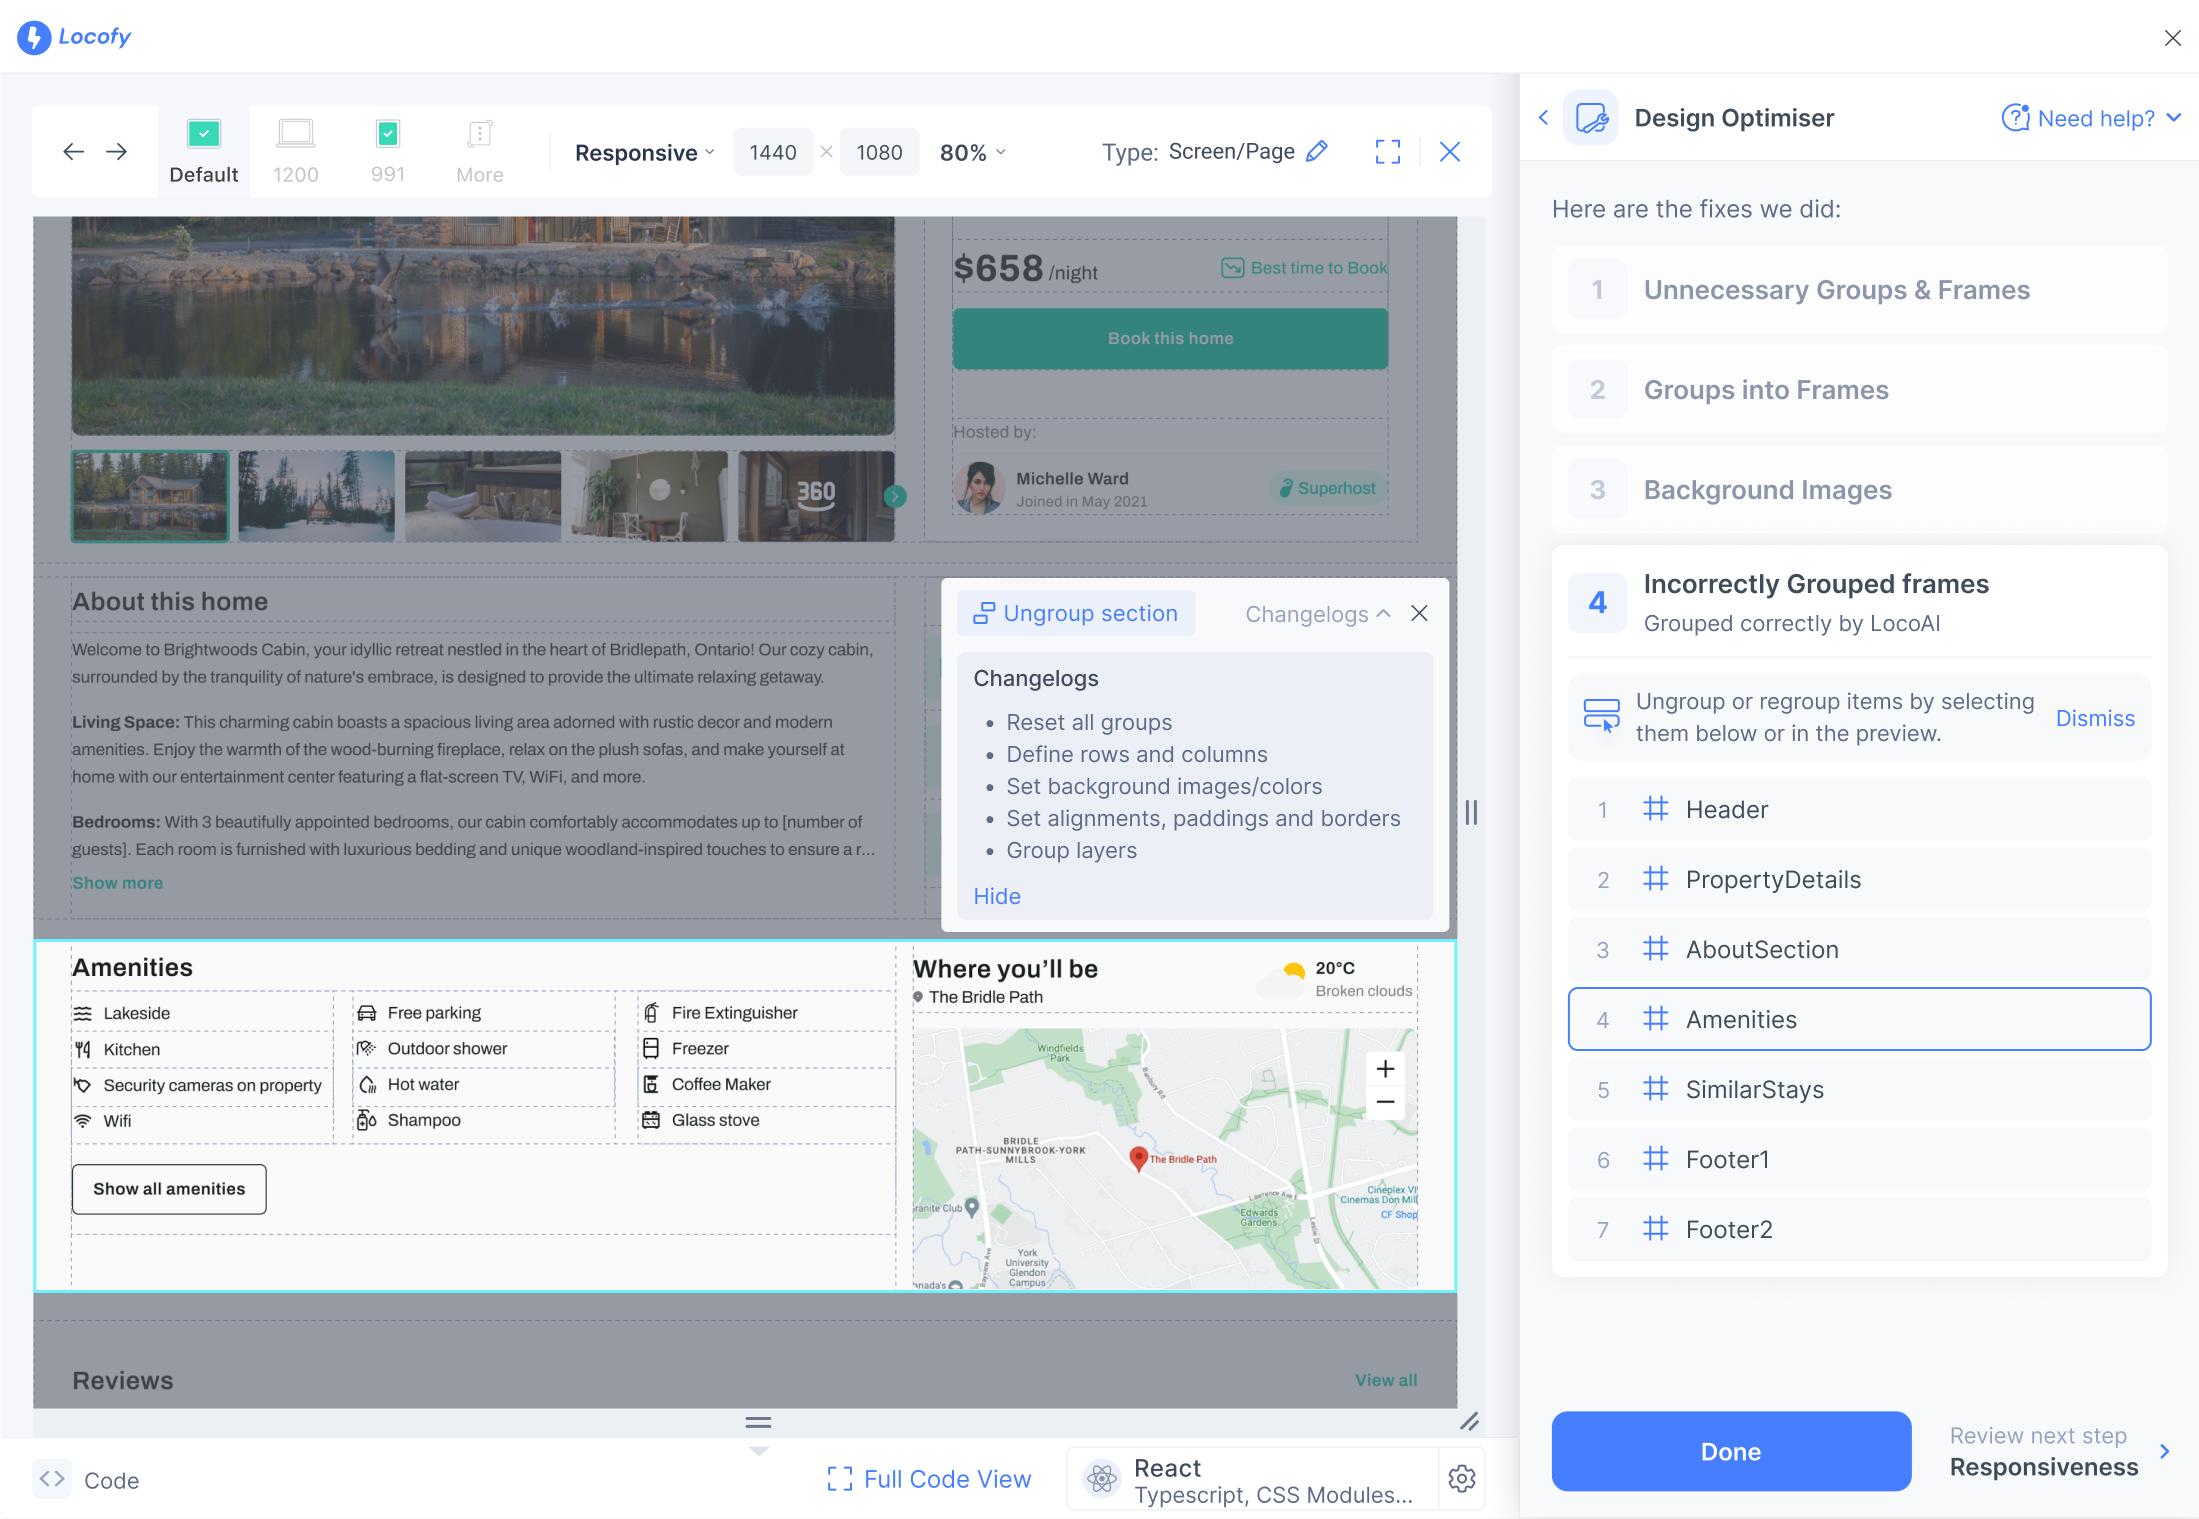
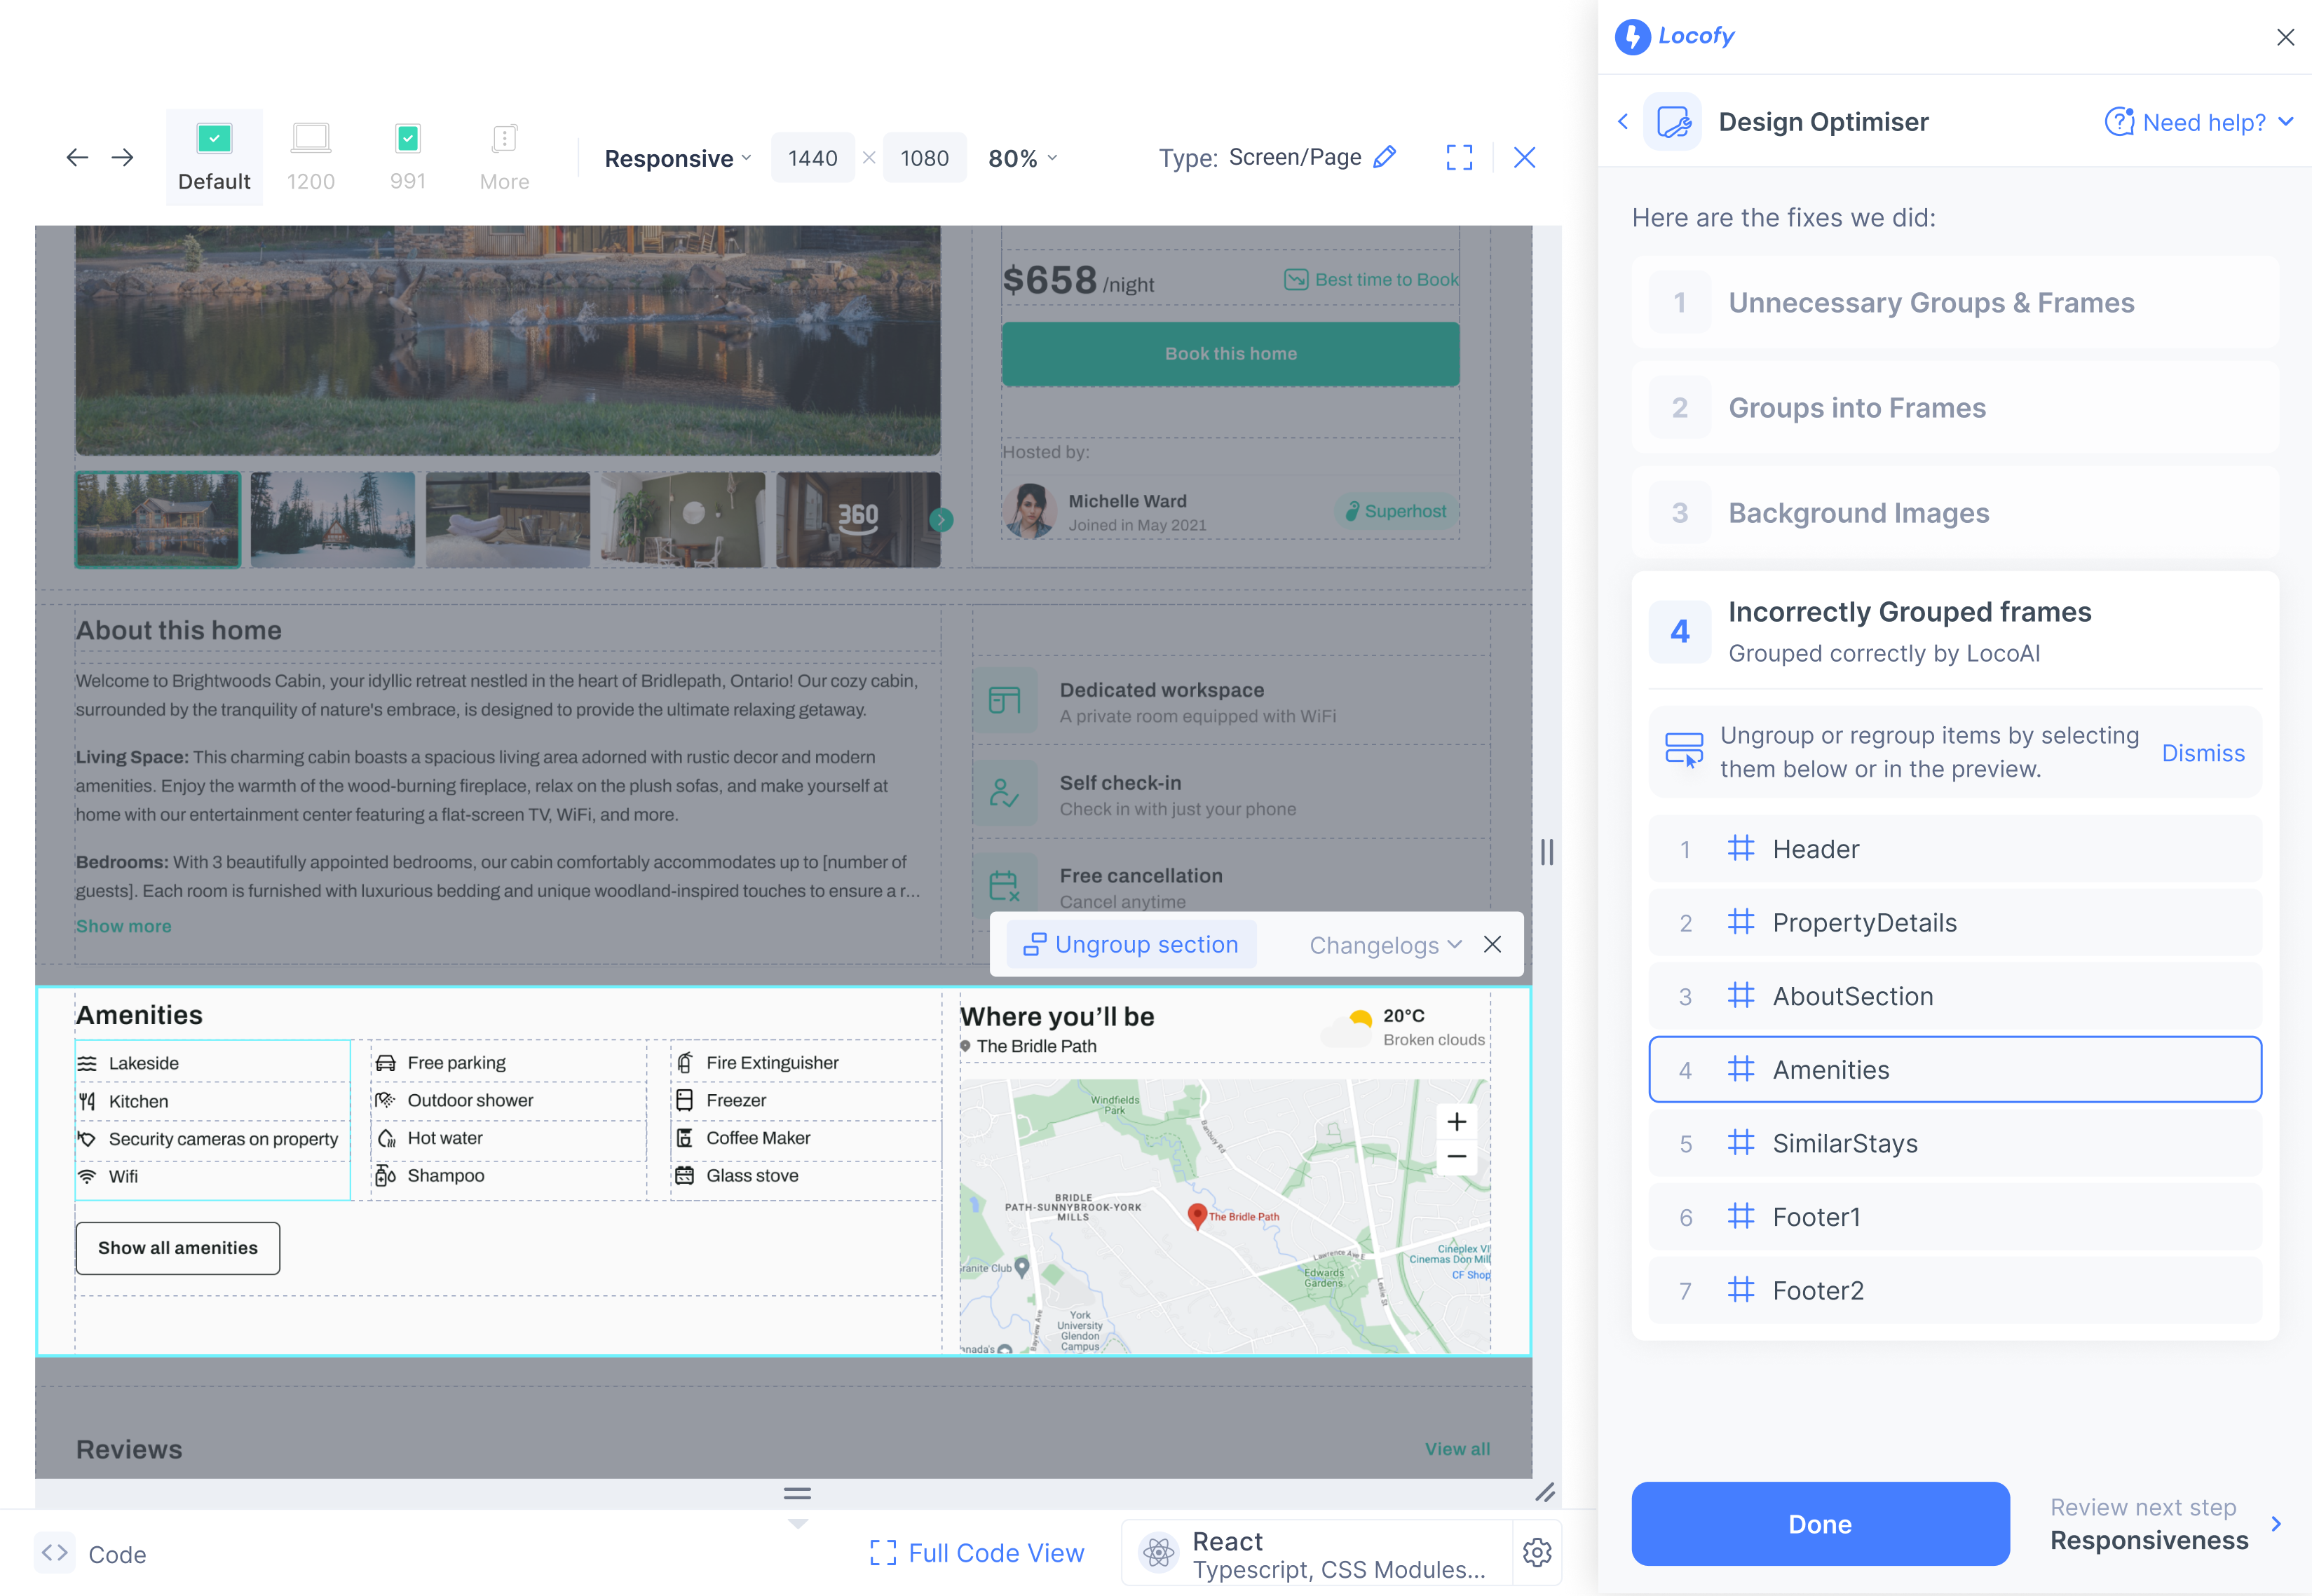
Layer Groupings
LocoAI will group elements for better structure. We then apply the relevant CSS property such as flex to these groups in later steps for responsiveness and enhanced code quality.
You can ungroup or regroup items by selecting them from the list or in the preview.
View in Preview
You can view the groups in preview by hovering over the element and clicking on "View in Preview".
You can either choose the group in the preview screen or in the list view on the right panel. On choosing the group,
- You can view the changes applied in the "Changelog" screen.
- You can choose to ungroup the given selection
Ungroup or regroup
- You can drag and select the new grouping. User can select multiple groups in this step and apply "Regroup"
- On regrouping, confirm if the new grouping proposed by LocoAI is correct and apply the fix
Layer Gaps
LocoAI will apply padding or equal gaps to 1 or more child elements to ensure consistent gaps.
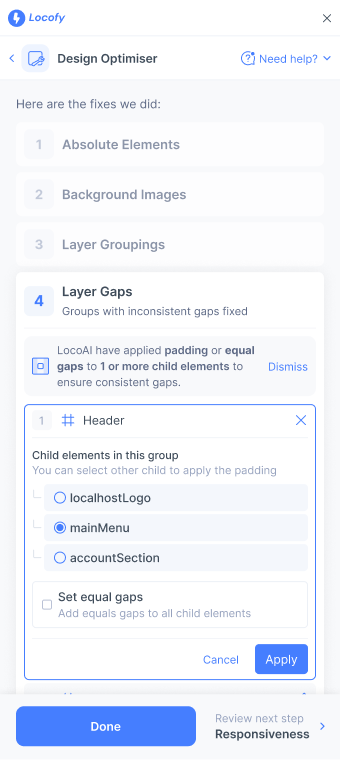
You can select which child the gap should be applied to which element if the LocoAI option is not correct.
-
You can click the edit button next to any of the layers in the list.
-
You will find a list of the children present in that layer.
-
You can apply equal gaps to the elements.
Layer Alignments
Lastly, you can view and edit the aligment optimisations LocoAI did for your design elements. This translates to the align-items CSS property in the generated code.
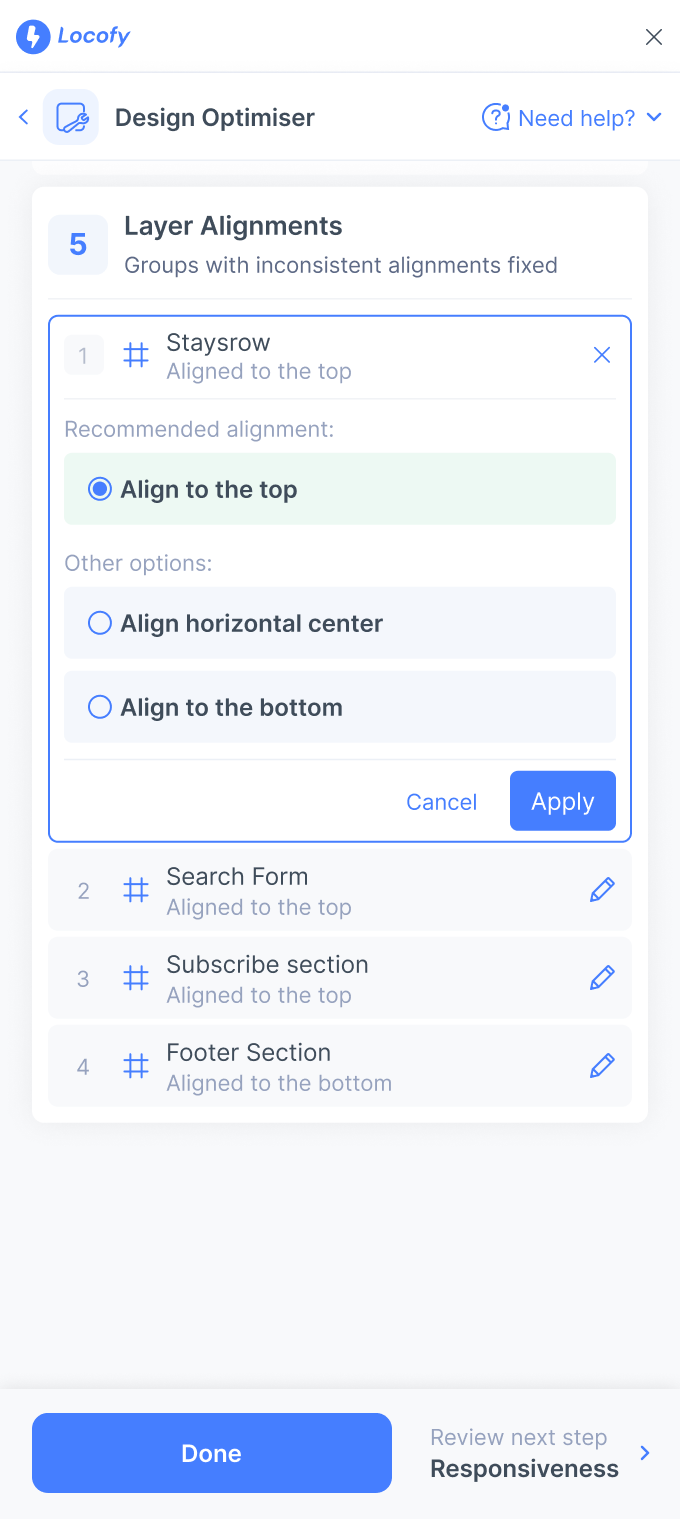
- You can click the edit button next to any of the layers in the list.
- You will find a few suggestions regarding alignment such as "Align to the Top".
- You can select the appropriate one and click on "Apply".
You can choose the other alignment options if the recommended option is not correct.