How to Tag Images with Locofy.ai
Learn how to tag images in this guide.
Tagging Images for Web Frameworks
- Open your design project in Figma.
- Select the image layer and launch the Locofy.ai plugin.
- Click on the Image tag in Step 2: Tag your layers (opens in a new tab).
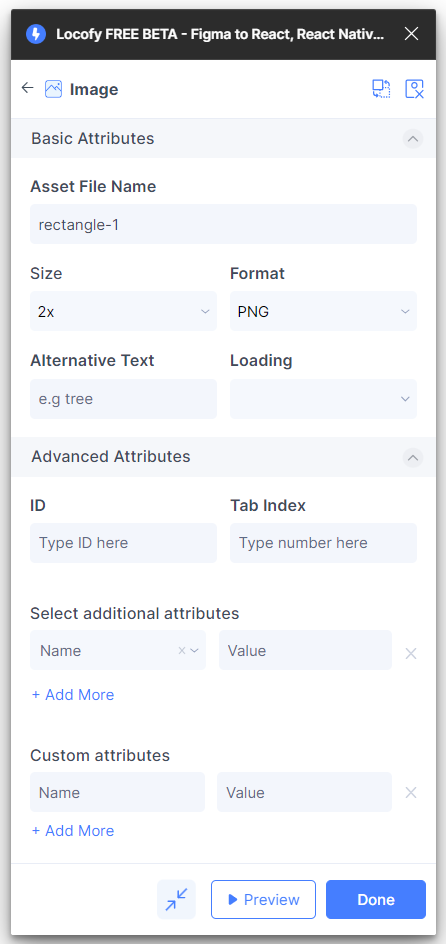
Web Image Properties:
- Asset file name: Name of your image file.
- Size: Image dimensions.
- Format: Image file type (e.g., PNG, JPEG, SVG).
- Alternate Text: For web accessibility.
- Loading: Choices between "Lazy" and "Eager".
- Advanced:
- ID: For styling or scripting.
- Tab Index: Tab order for interactive elements.
- CSS: Styling properties.
- Custom attributes: Additional attributes for the element.
Tagging Images for Mobile Framework
- Navigate to your mobile design in Figma.
- With the image layer selected, access the Locofy.ai plugin.
- Click on Image tag in Step 2: Tag your layers (opens in a new tab).
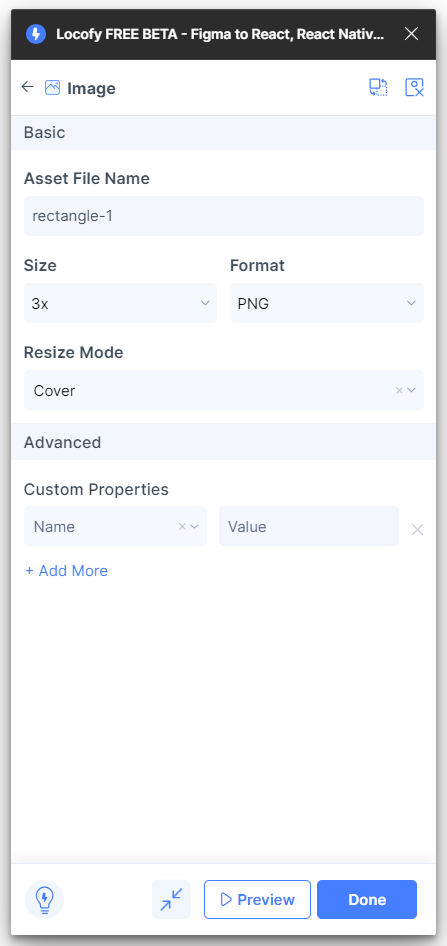
Mobile Image Properties:
- Asset file name: Name of the image.
- Size: Image dimensions.
- Format: Image type (e.g., PNG, JPEG, SVG).
- Resize Mode: Determines how the image adjusts to its container. Options include:
- Cover: Scales the image to cover the container while maintaining its aspect ratio.
- Contain: Scales the image to fit within the container while maintaining its aspect ratio.
- Stretch: Stretches the image to fit the container's dimensions, potentially distorting it.
- Repeat: Repeats the image to cover the container.
- Center: Centers the image in the container without resizing.
- Advanced:
- Custom Properties - CSS: Specific styling properties for mobile.