GitHub Integration with folder management and smart code merge
Streamlined workflow to let you organize your repository the way you want it, and keep your designs and code in sync. All code—including changes made in Agent Mode (theming, validation, accessibility, and other AI-driven enhancements)—is synced to your GitHub repository when you push.
Sync to GitHub from the Builder
- Click the blue “Sync / Export / Deploy” button in the top right hand corner
- Select “Sync with GitHub" as your Export Method
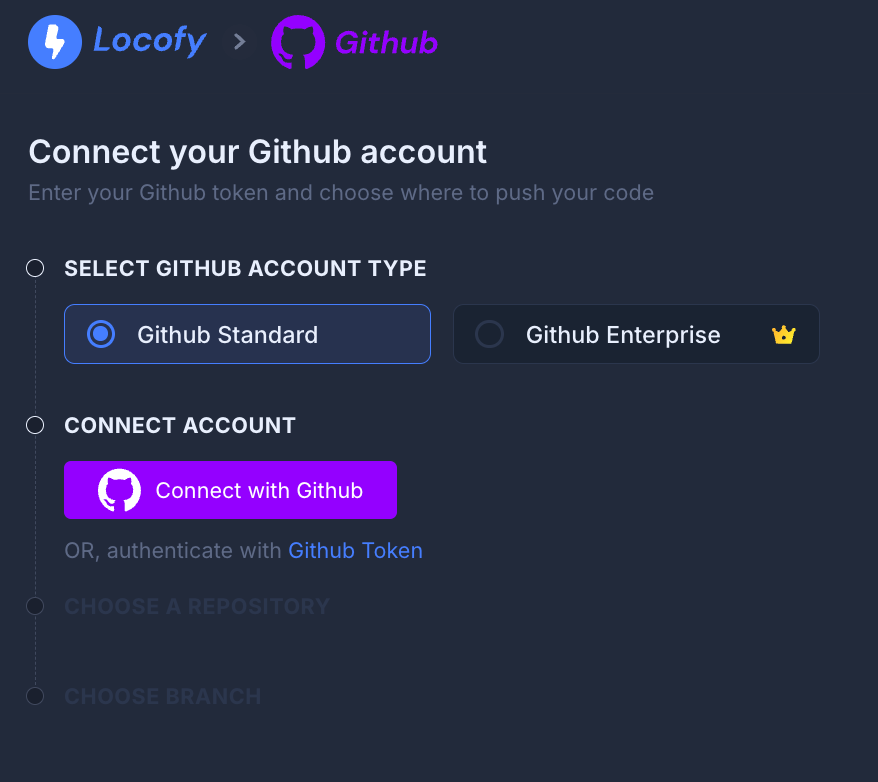
- You will now see two options for connecting your account:
- GitHub Standard – Connect using your regular GitHub account.
- GitHub Enterprise – For customers with a GitHub Enterprise instance.
Connecting a GitHub Standard Account
- Click on "Connect with GitHub" button, and select the GitHub account you wish to sync with.
- Alternatively, you can enter your GitHub Access token to connect your account.
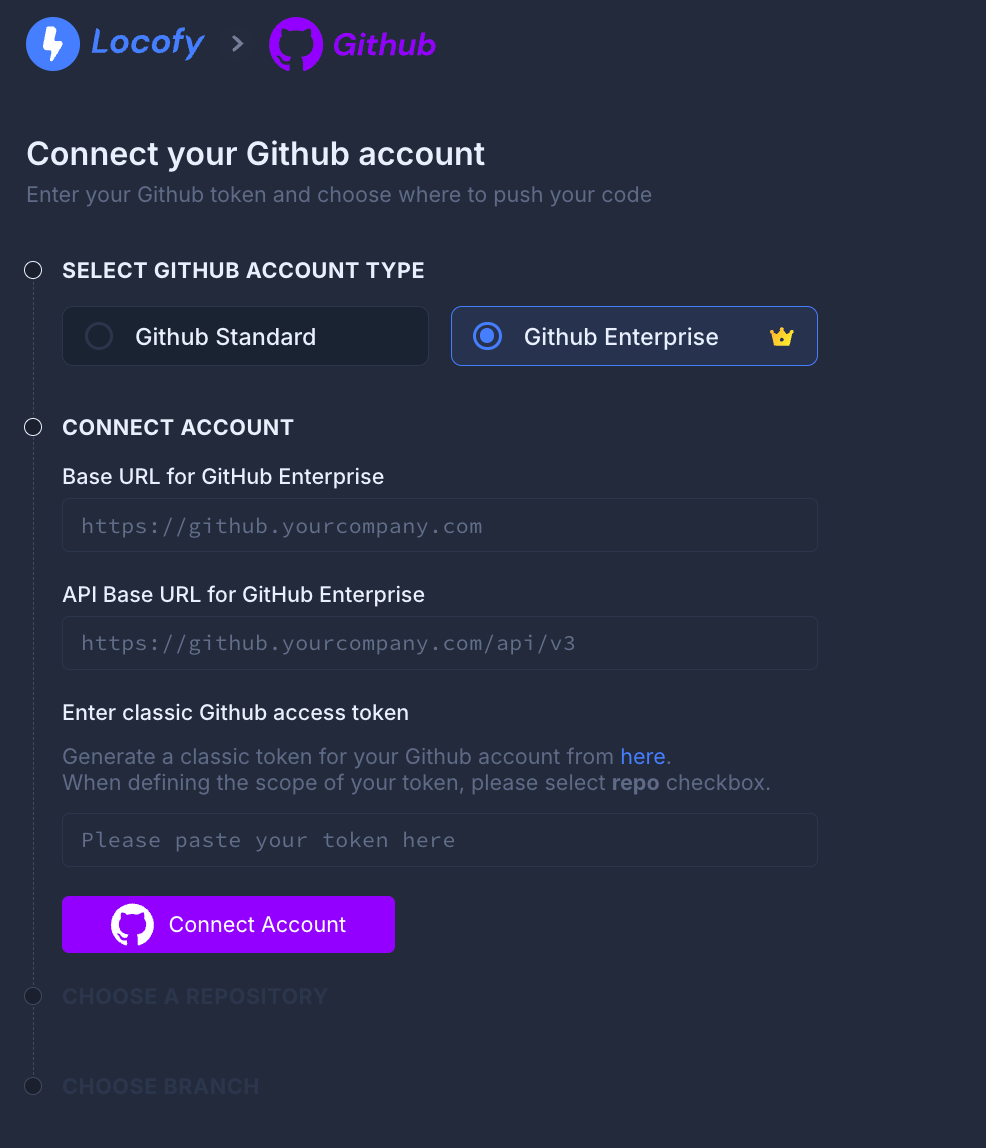
Connecting a GitHub Enterprise Account
- Enter the following details:
- Base URL for GitHub Enterprise (e.g., https://github.yourcompany.com (opens in a new tab))
- API Base URL (e.g., https://github.yourcompany.com/api/v3 (opens in a new tab))
- Classic GitHub access token (Generate a token for your account here (opens in a new tab))
- Click on "Connect Account" button.
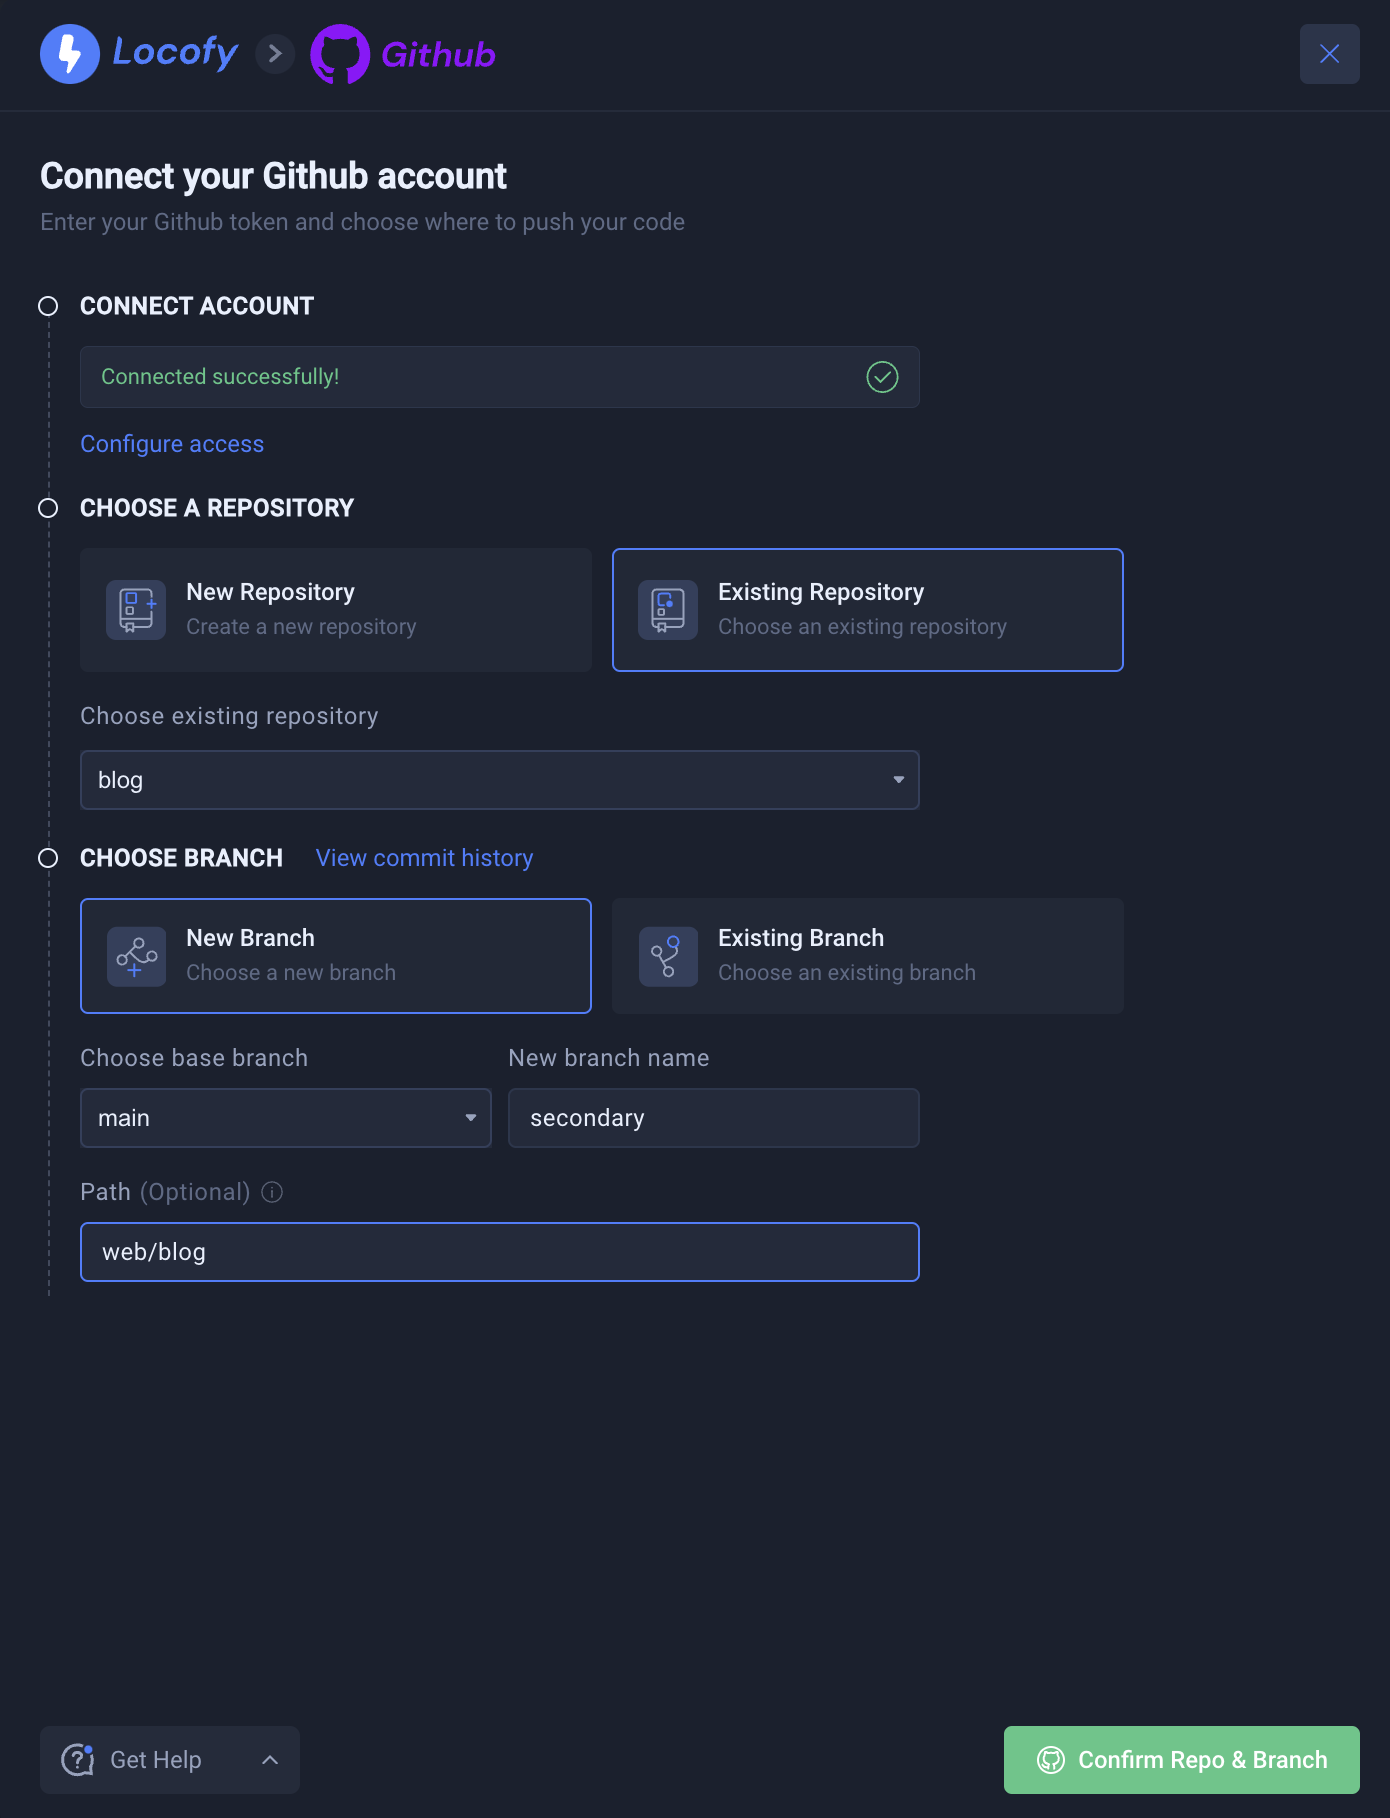
Select Repo and Branch
Once connected via either GitHub Standard or GitHub Enterprise, the following steps are the same:
- Choose to push to a new repo, or push to an existing repo
- If you choose to push to an existing repo, you’ll be asked to select a branch to push to. You may push to a new branch or select an existing branch
- You can optionally choose where to push the generated code during a repository sync for an existing branch by specifying the desired path. This allows you to organize your code efficiently. For example, you might want to push the Locofy code to a particular folder within your GitHub repository. This flexibility is especially useful in scenarios like managing a monorepo.
- Click “Confirm Repo and Branch”.
Pushing Individual Components to GitHub
You can sync individual components as well to GitHub. This enables you to incrementally adopt Locofy.ai and easily iterate over large projects by syncing only the new features by converting them to components.
You can read more on that by clicking here (opens in a new tab).
File Manager
You will be taken to the “File Manager” screen to review and confirm your files before pushing to GitHub.
Here is where you can organise your folder and file structure. You can take the following actions:
- Rename files and folders
- Move files and folders
- Delete files files and folders
- Create new folders
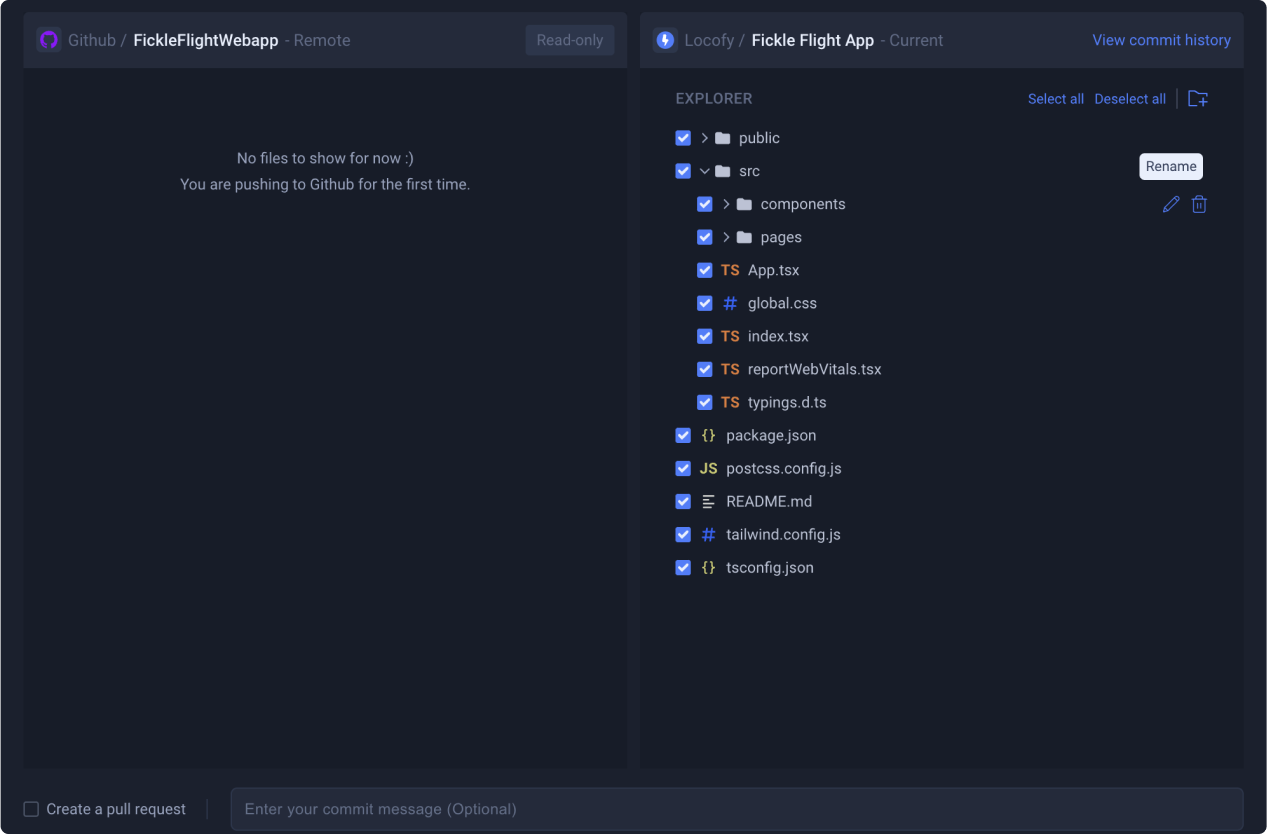
After you have finalised your file structure, click on “Review files” to view all of the files that will be pushed to GitHub. Then, click “Push to GitHub.

Smart Merge and Conflict Resolution
Locofy’s smart merge feature allows you to continue iterating on your design and codebase in parallel, while helping you to keep them both in sync.
After making updates to your design, continue to push to your existing repository in GitHub.
There may have been changes that were made to your code base, such as API Calls and additional logic layers that you’ve added to the frontend code.
Handling Conflicts
Locofy will automatically detect conflicts and raise them to your notice in the conflict resolution panel.
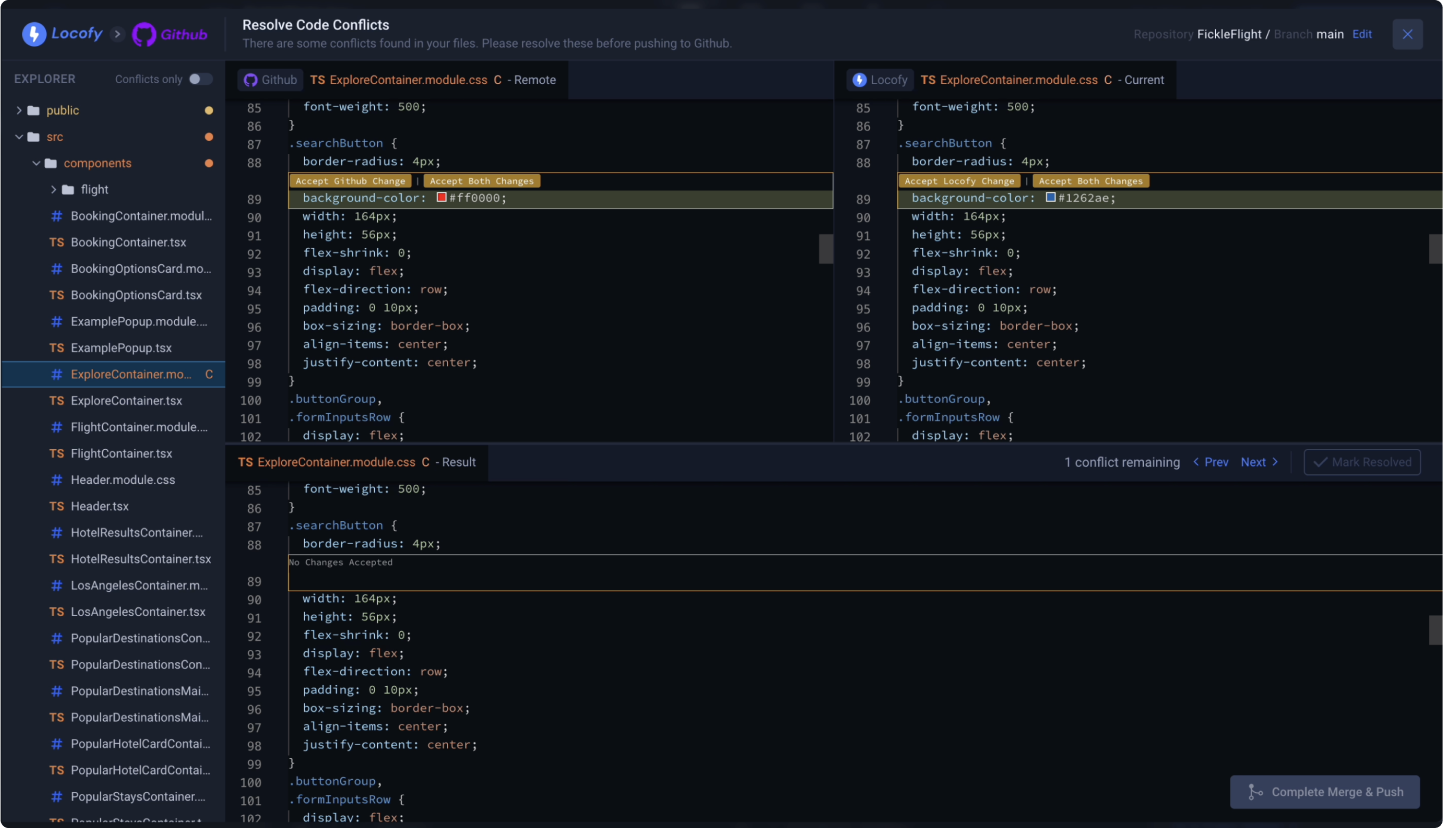
The left code panel shows you the code from your GitHub Repo, and the right code panel shows you the newly generated code based on your updated design.
The code panel at the bottom shows you the resultant code after completing the merge. This is the code that will be pushed to your GitHub repository
You can resolve the conflict by:
- Accepting the change on GitHub
- Or accepting the change from Locofy
- Or accept both changes
Once the conflicts are resolved click on “Mark Resolve” to proceed to the next file with conflicts.

After all the conflicts have been resolved, the “Complete Merge & Push” button will become active and you can click on it to push to GitHub.