Using Expo for React Native Projects
Learn how to configure your Locofy React Native project to work with Expo
Using Expo to Ship Mobile Faster
Expo is an alternative way of building and maintaining React Native apps. It offers a bunch of advantages not present in the React Native CLI such as:
- One code base to build both iOS and Android apps with just TypeScript or JavaScript. Expo does this by providing you with packages that wrap native code so you don’t have to deal with managing native Java or Swift code.
- Easily share your apps for internal testing using Expo Go
- Seamlessly ship bug fixes & updates without having the user update the app.
- Cloud builds via EAS Builds for automated & quick build time
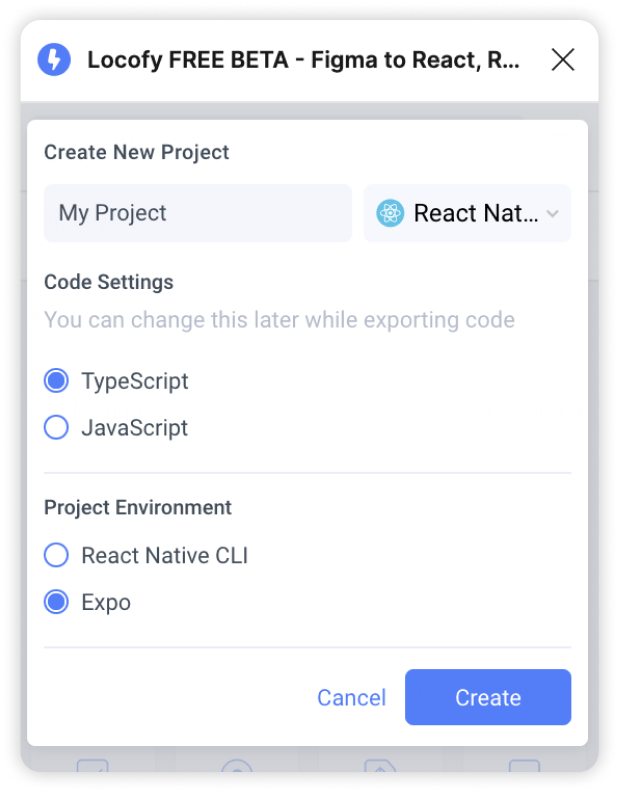
Creating a new React Native project that uses Expo
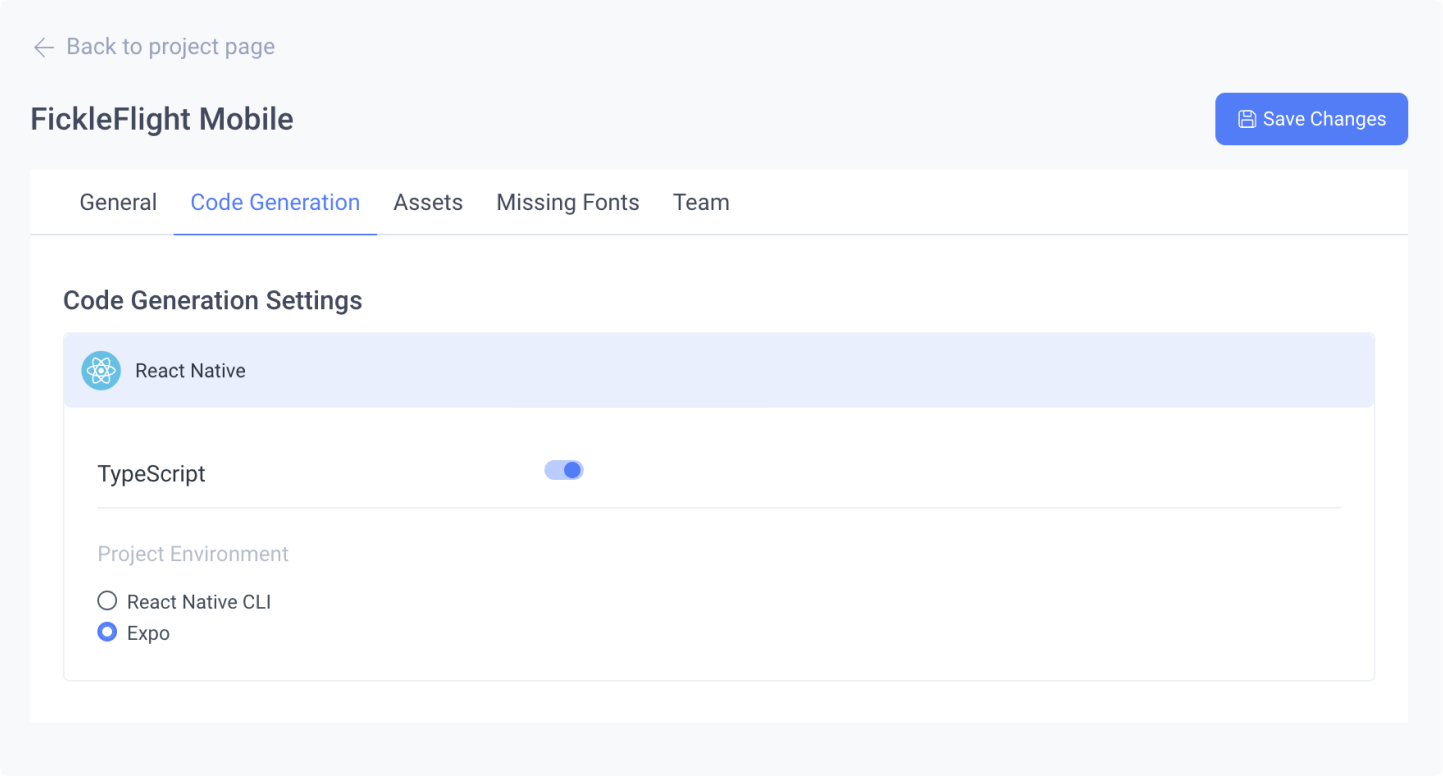
When creating a new React Native project, you’ll need to set up your framework settings. Select Expo under the Project Environment and click “Create” to continue
Switching to Expo for an existing React Native project
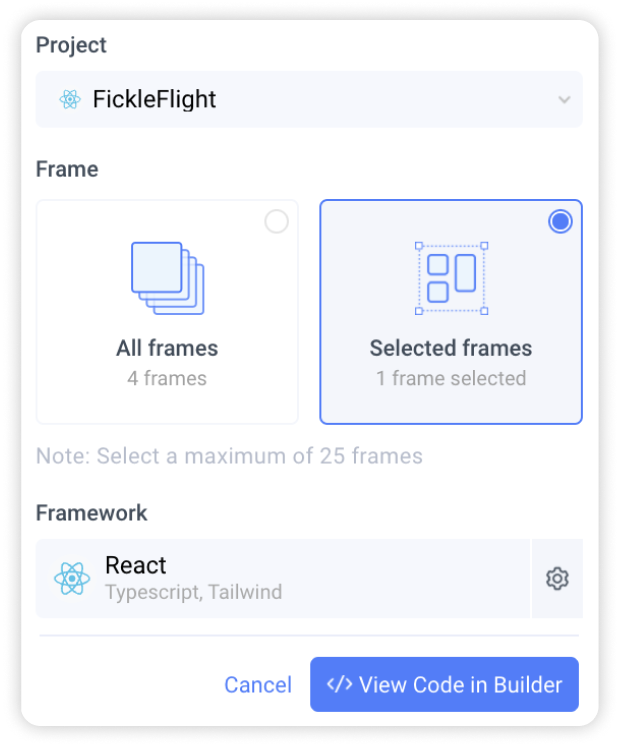
If you have an existing React Native project, you can edit your Code settings in multiple locations:
- Before syncing your designs to view code in Builder, click the gear icon to edit Code settings
- In Locofy Builder, click the gear icon in the code panel to view and edit Code settings
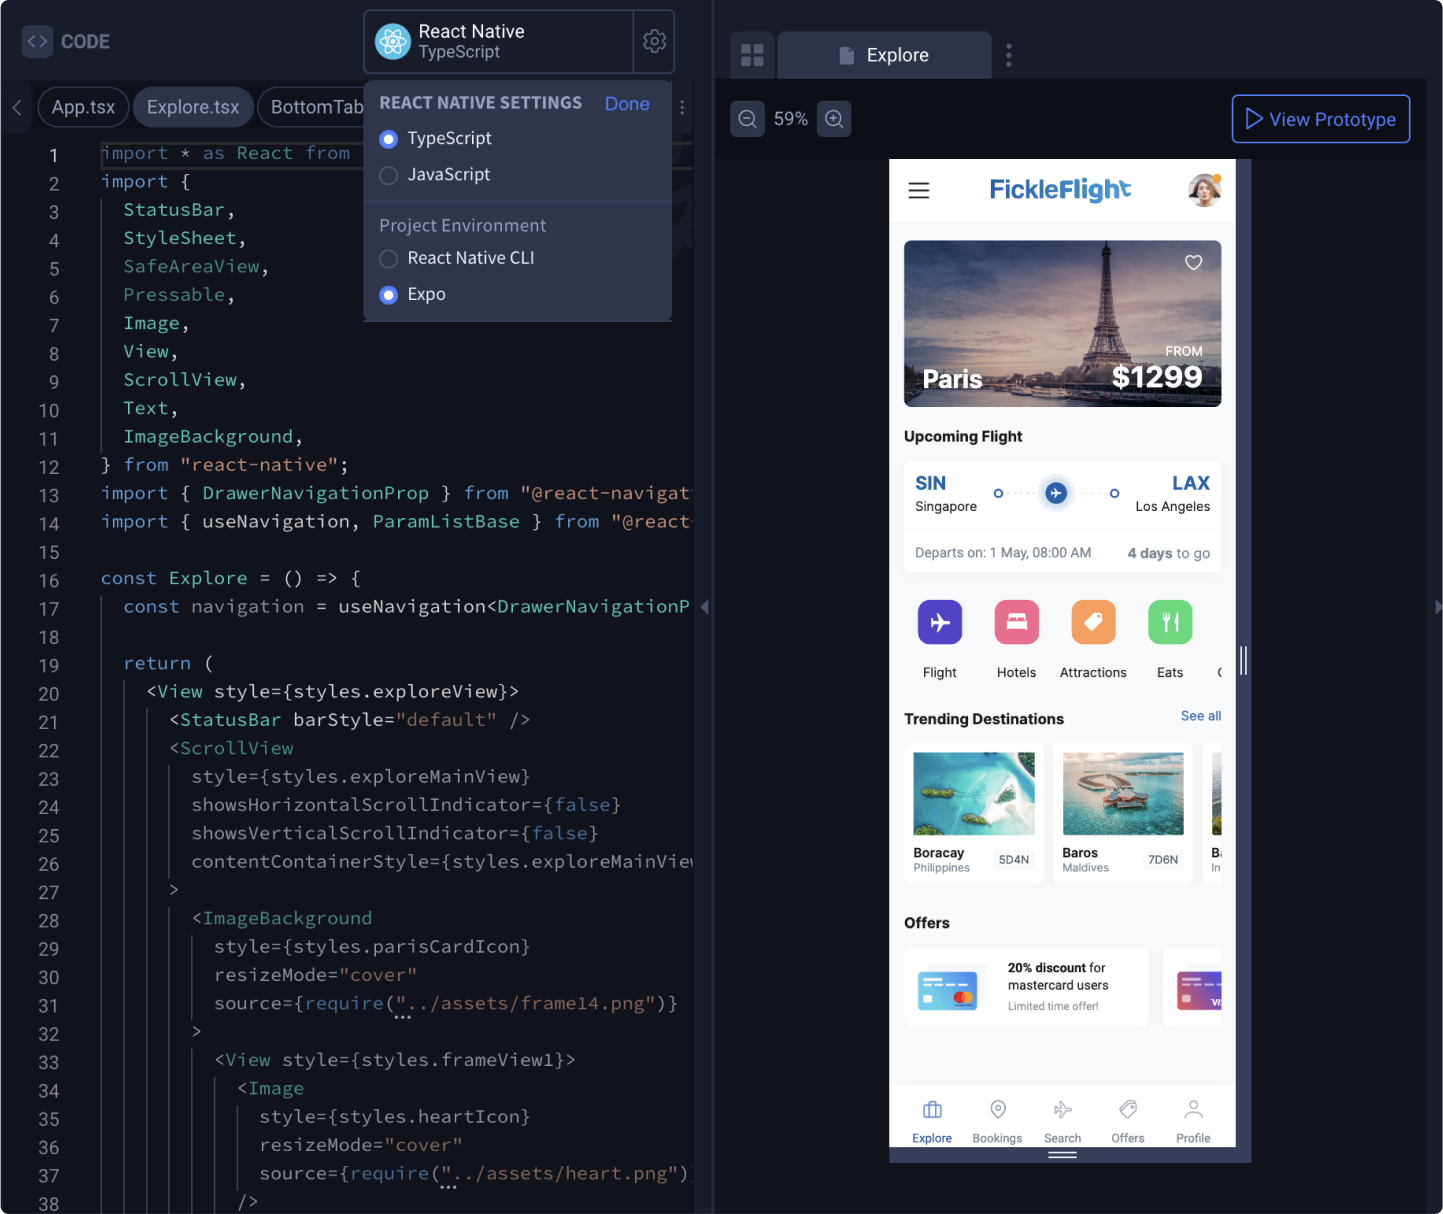
- On the Locofy dashboard, head to project settings and click the “Code Generation” tab to view and edit Code settings
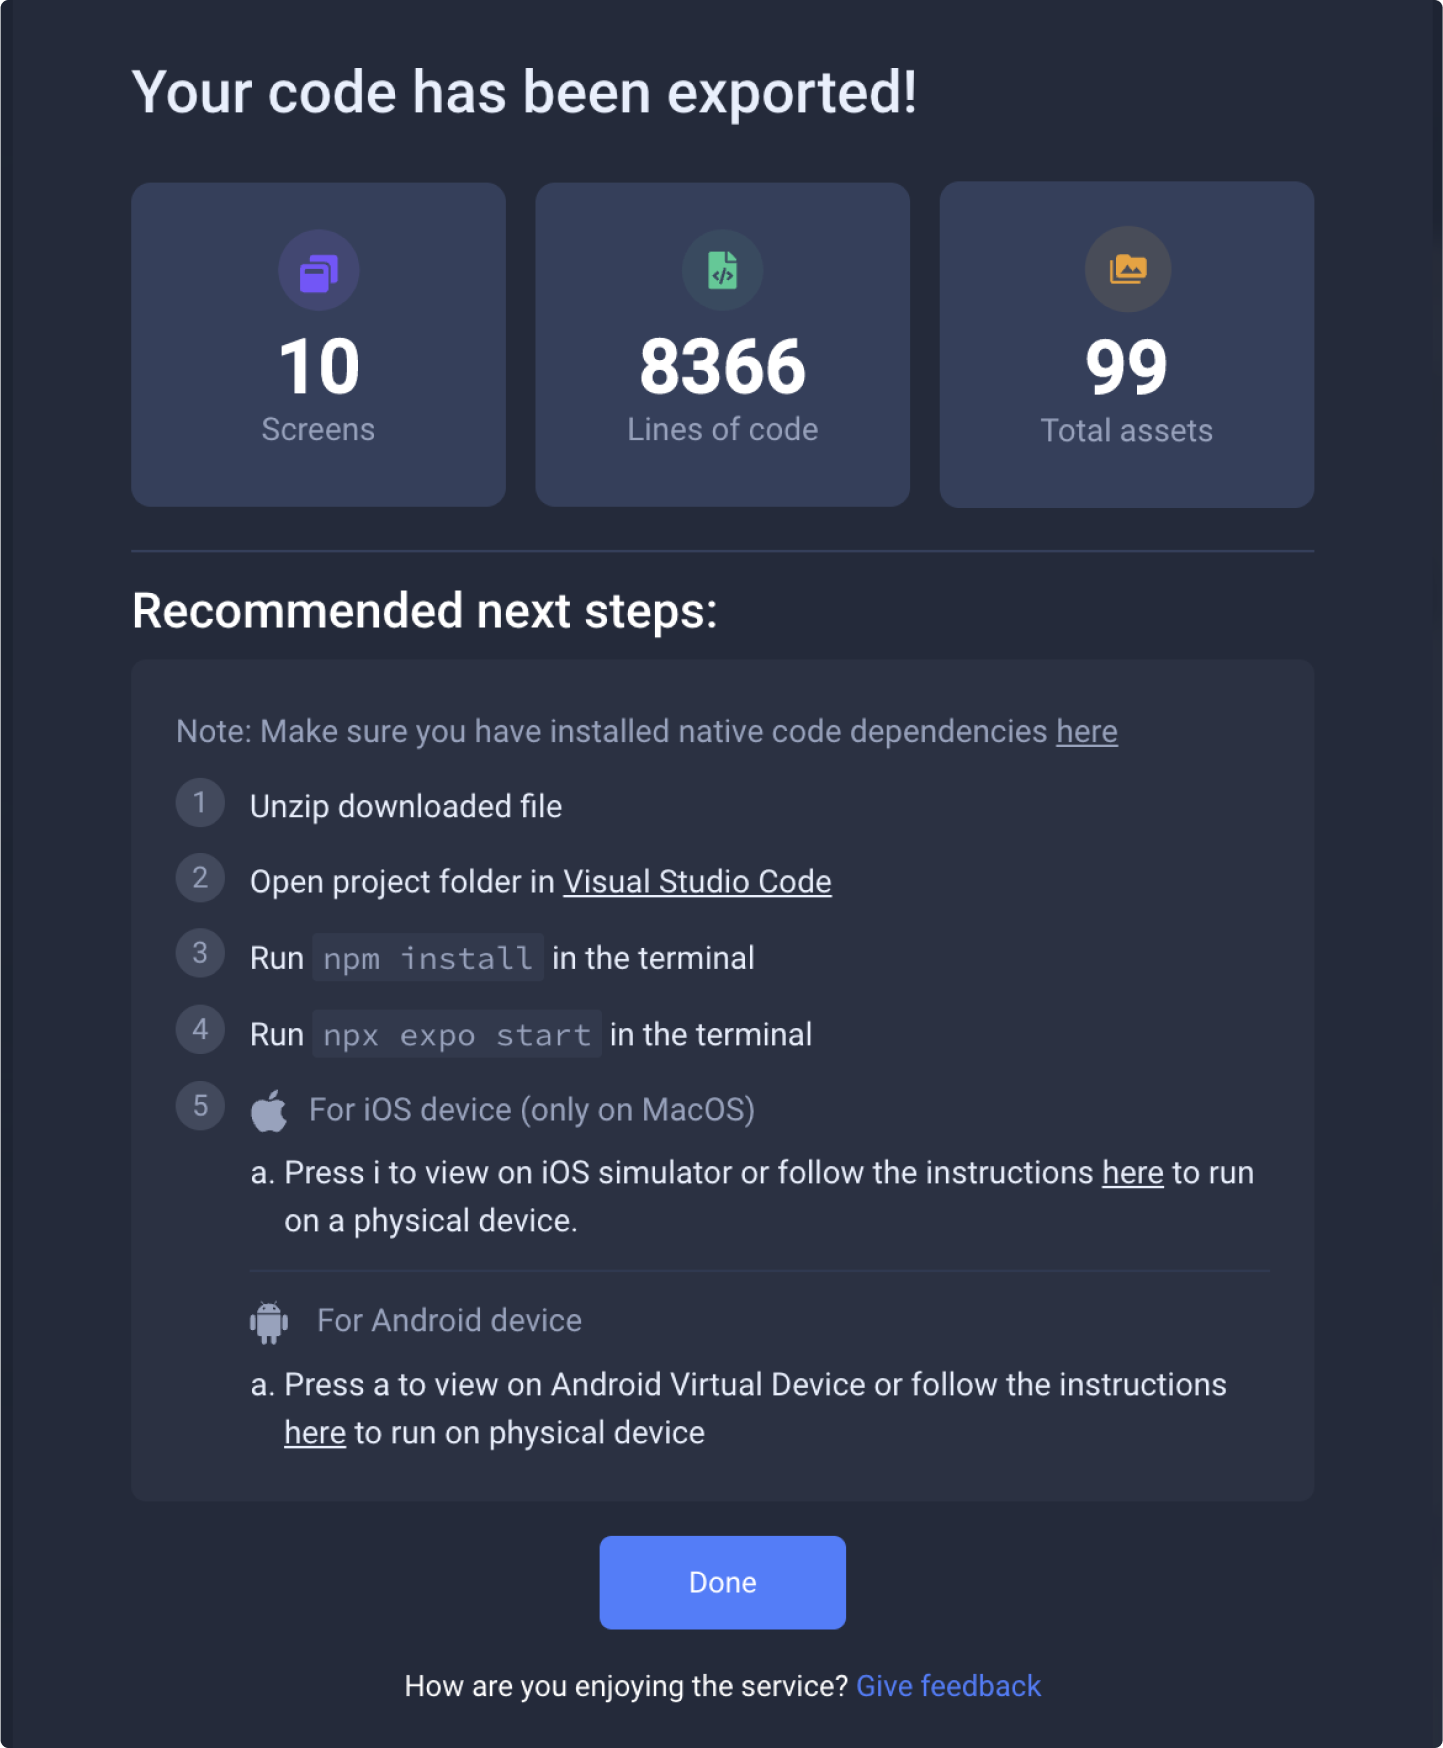
Follow these simple steps to run your exported code using Expo
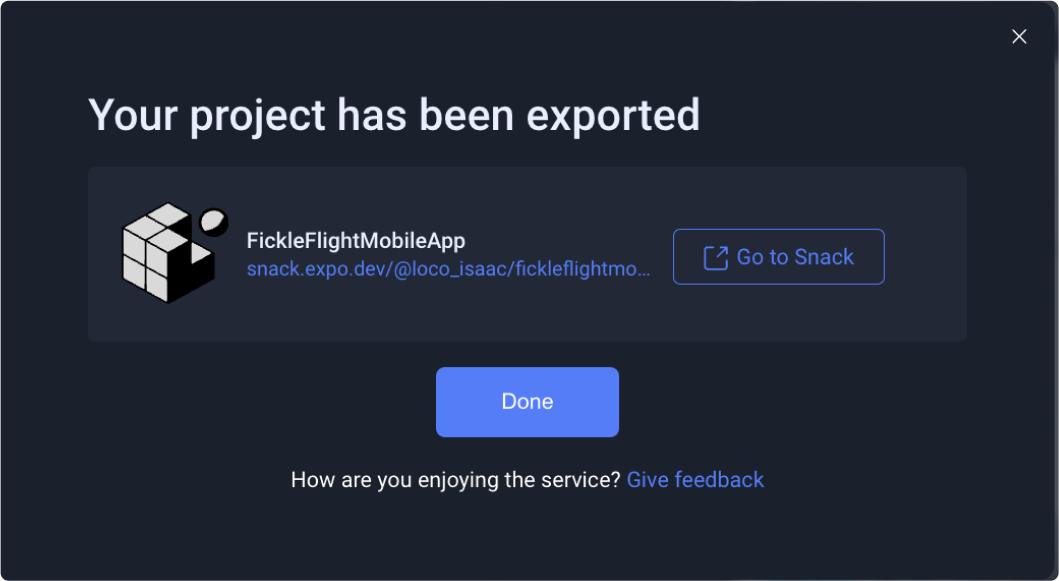
Export and run your app on Expo Snack
Turn designs to code with Locofy, and run your mobile app without needing to set up your development environment
Making a push to Expo Snack
To export your project to a Snack:
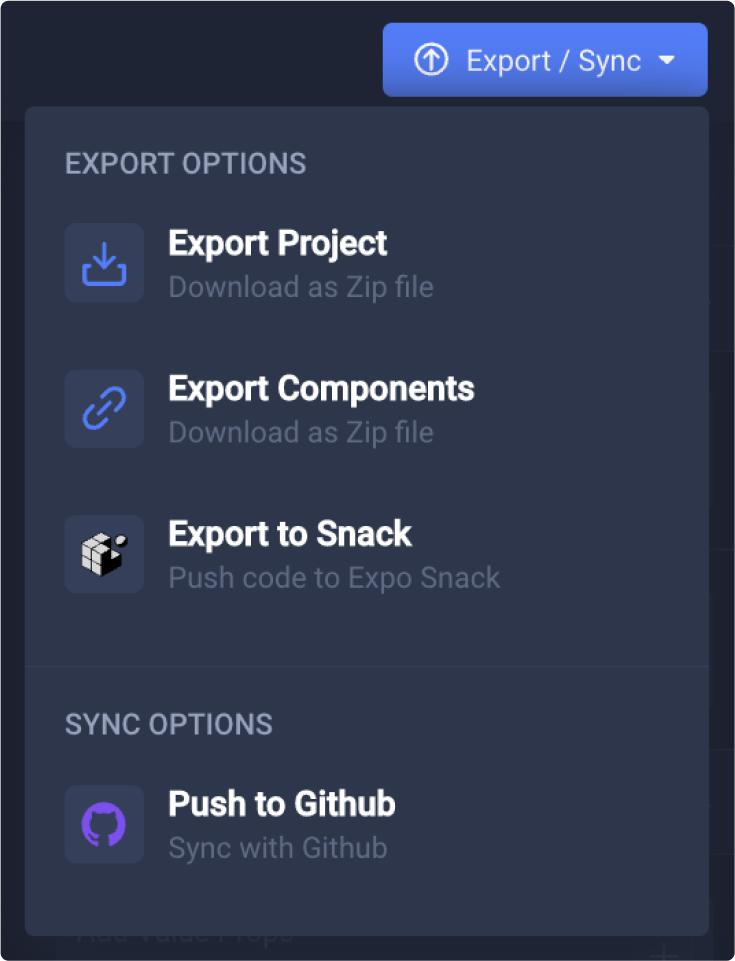
- Open your project in Locofy Builder and select the blue “Export/Deploy” button
-
Click on “Export to Snack”
-
Add your Expo Snack token to connect your account
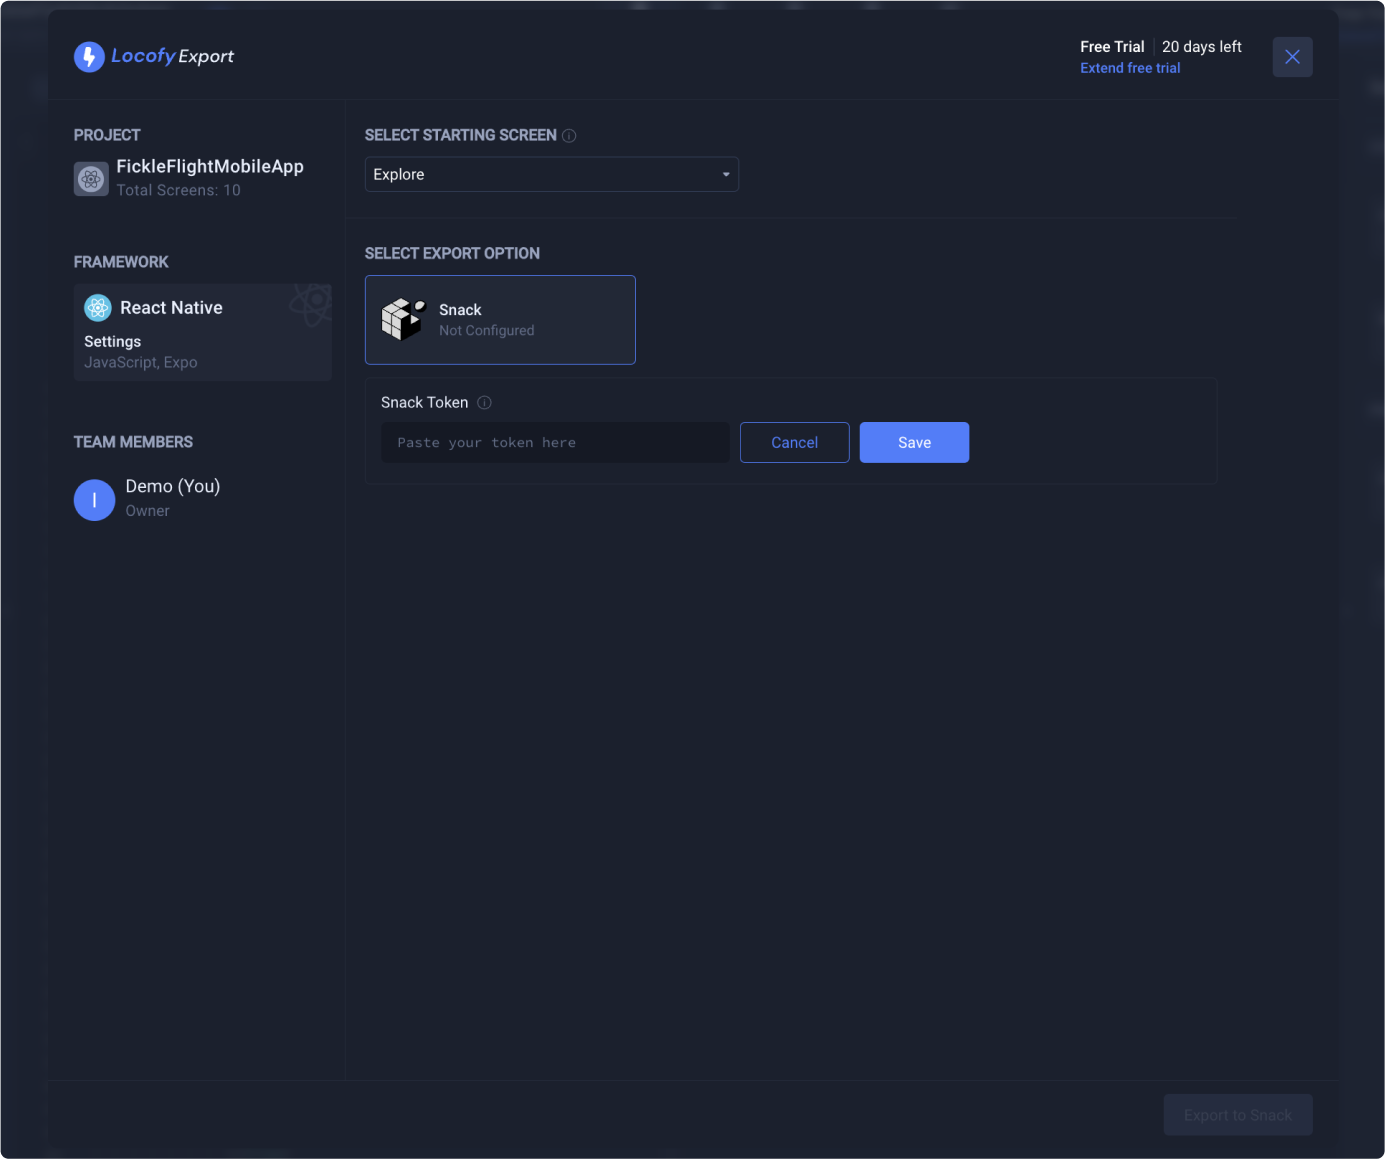
- Click on the green “Export to Snack” button to begin your export
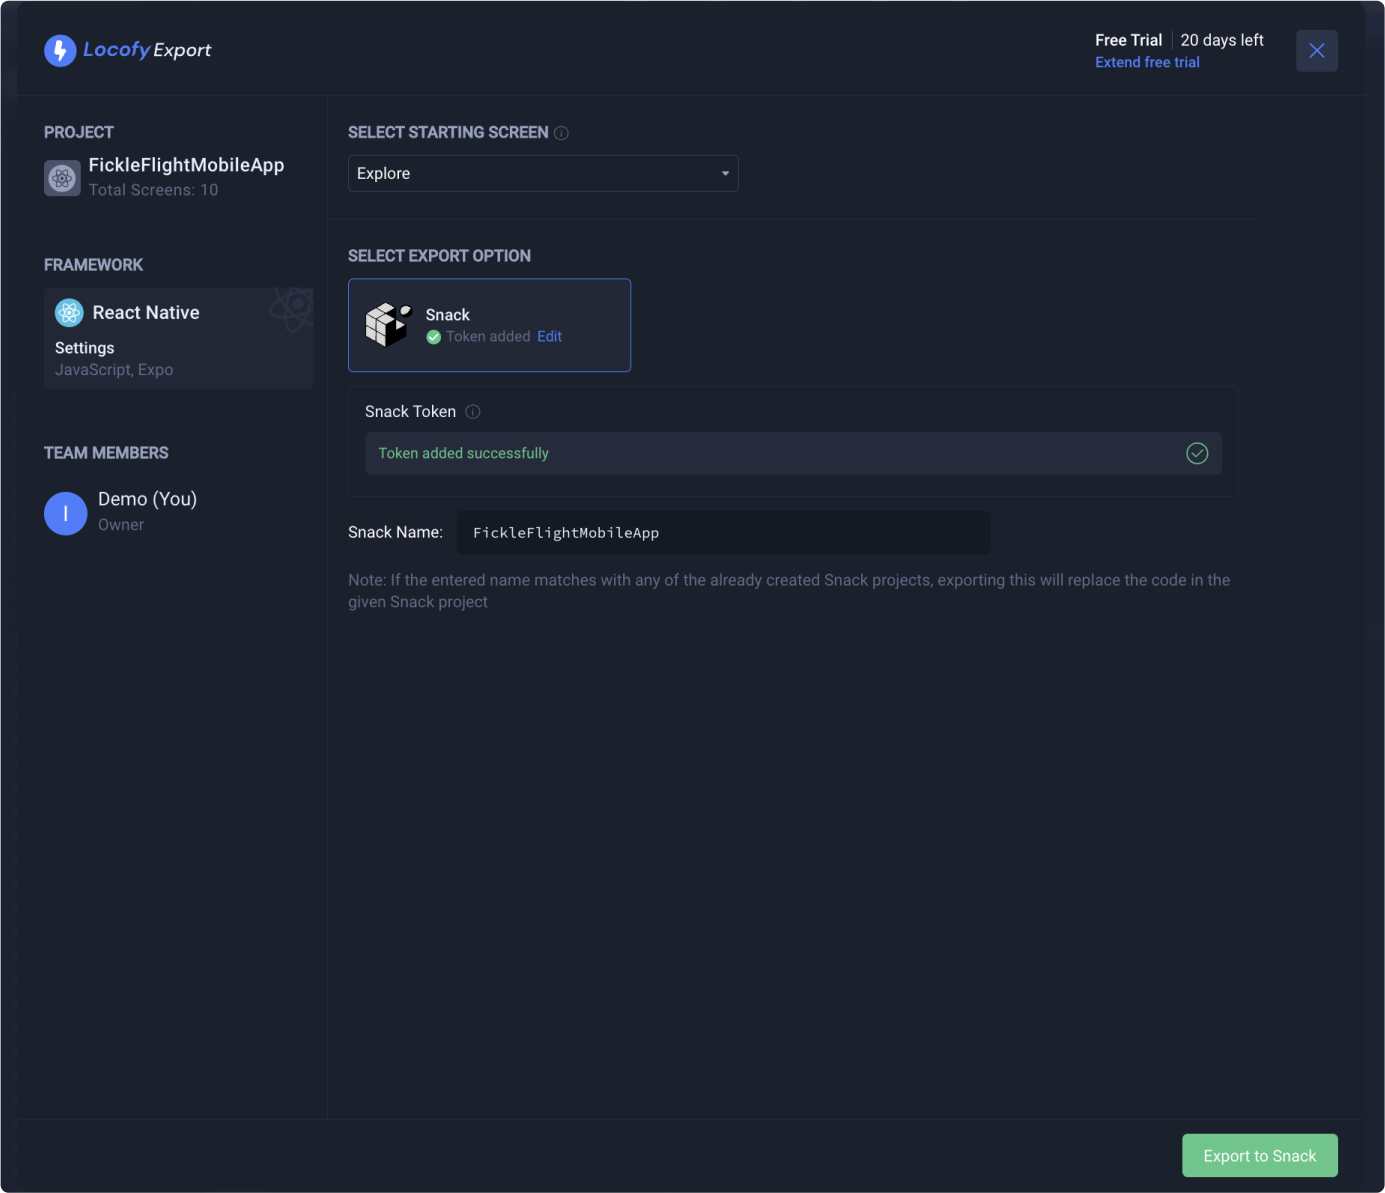
- View your app on Expo Snack once the export is complete.