Understanding React Context: A Comprehensive Tutorial for Beginners


React has become a go-to choice for front-end development due to its ease of use and flexibility in creating dynamic and interactive user interfaces.
However, as applications built with React become more complex, managing the application state can become challenging as prop drilling can easily get out of hand. This is where the Context API of React can be extremely useful.
Context-based state management is a technique used in React to manage application states in a centralized location. This makes it easier to access and modify different parts of the application without the need to pass props down through multiple levels of the component hierarchy. By doing so, developers can make their code more maintainable and efficient.
In this guide, we'll explore the core concepts behind context-based state management in React, including how it can be used, and how it can be implemented in practice. We'll cover various aspects of context, such as creating a context, consuming a context, and when to use context.
So let's dive in.
React Context: Facilitating Easy Data Sharing Across Components
Before learning the theory behind context, it's a good idea to understand why context is used.
And the straightforward answer is to solve the issue of prop drilling.
In React, "prop drilling" refers to the issue of passing down specific props from a parent component to multiple child components, which often requires manual intervention and can be a cumbersome process.
Below is an example of a parent component with two child components that have more child components of their own.
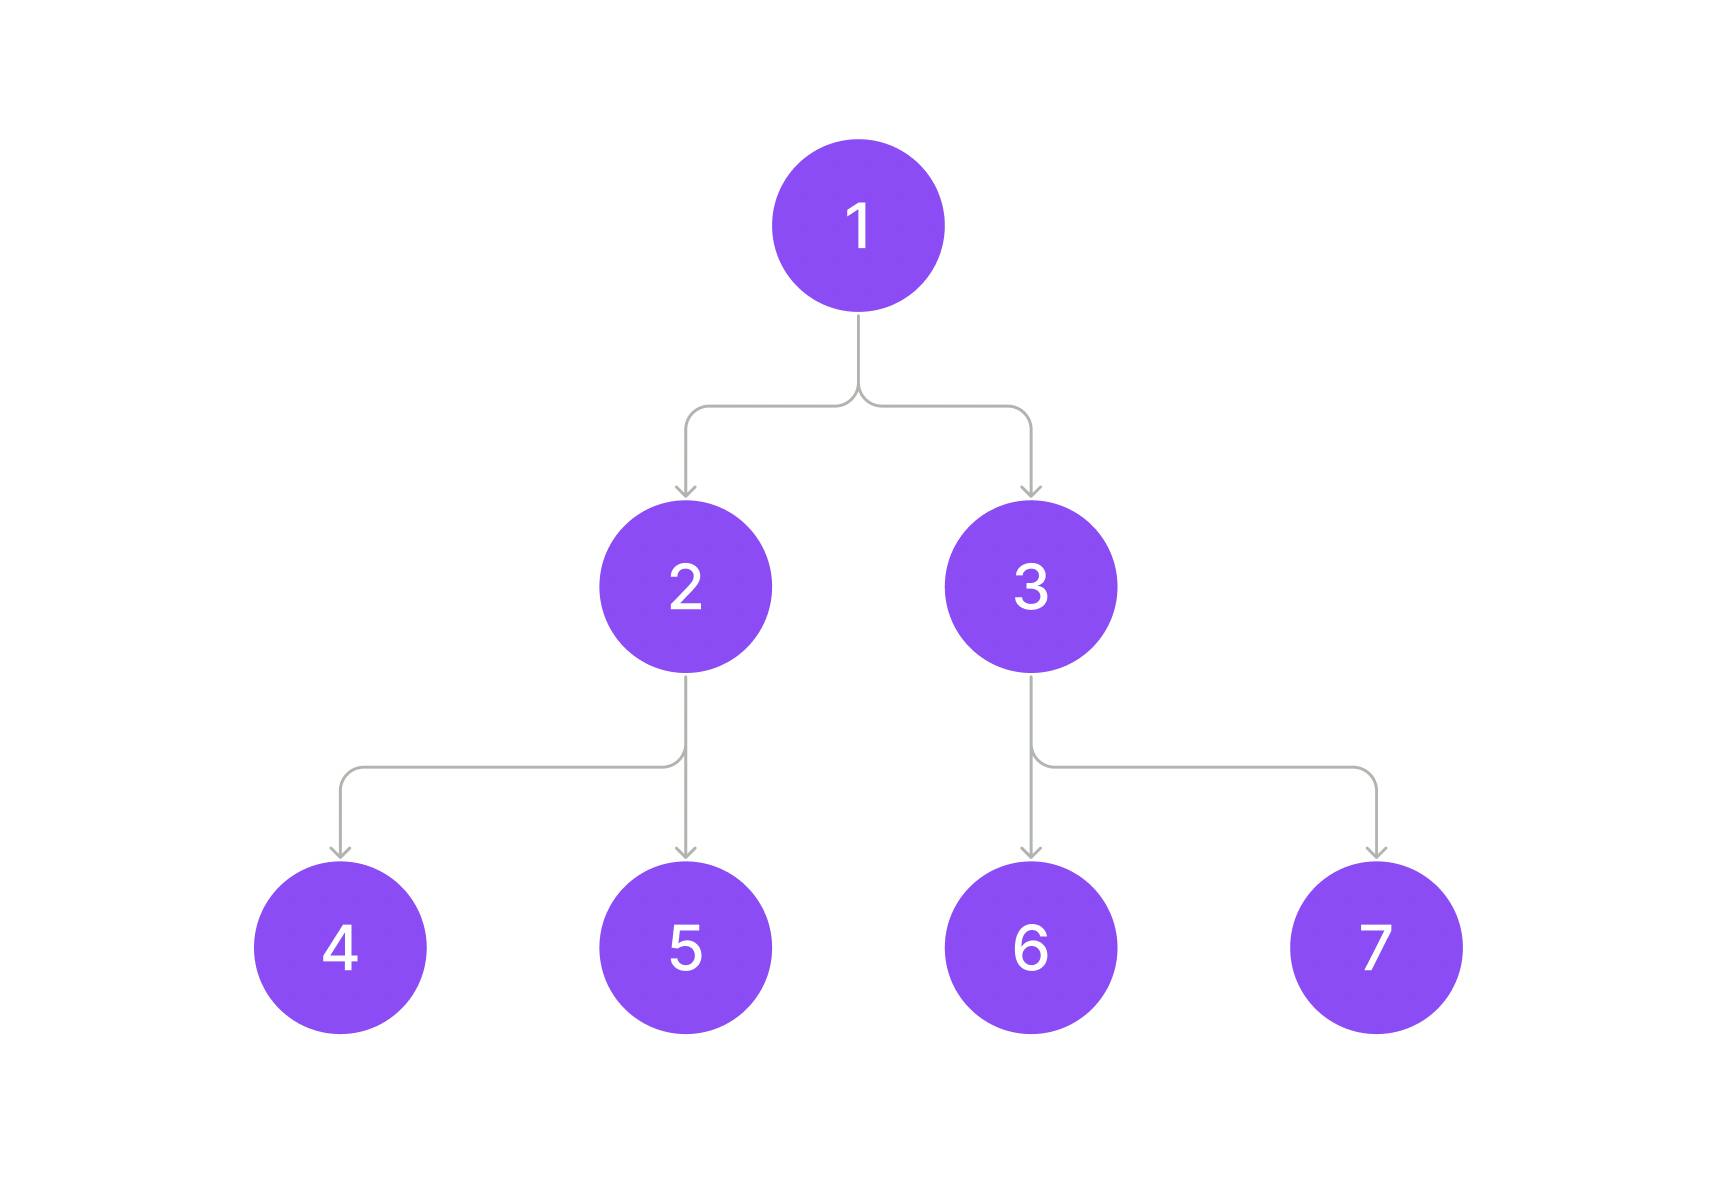
For instance, imagine we need certain props in components 1, 3, and 6 - we would have to pass those props down manually to each component and sometimes, it is not even possible to have the same props in two components with different parent components.
This also introduces a new issue: updating the data. Because the same prop is passed down so many times, it becomes hard to manage which component will be responsible for updating the data and how this might affect the re-rendering of the component tree.
This can be a frustrating problem to deal with, especially in large applications where the number of components involved can be substantial. To address this issue, we can use React Context or other state management libraries like Redux.
React Context Explained: A Comprehensive Overview
As we know, React Context is a powerful feature in React that allows developers to share data between components without having to pass props manually.
Using Context in your React application requires only three crucial steps:
Create the context
The first step to using Context in your React application is to create a Context object. This object is created using the “createContext()” function provided by the React module.
This function takes an initial value as a parameter and returns a new Context object.
Provide a context value
After creating the Context object, you need to provide a value to it. This value is passed to child components using a Provider component. This Provider component is also created using the Context object, which you created in step one.
The Provider component is placed at the top of the component tree to share the Context value with all child components. You can pass any value to the Provider component that you want to share between components.
Consume the context value
Once you have provided a value to the Context using the Provider component, you can consume that value in any child component using a Consumer component.
You can even use the “useContext” hook instead of the Consumer component to simplify this process even further.
We will be going to use the “useContext” hook in this blog.
Let’s take an example.
In this example, we define a Context object called MyContext using the “createContext()” method provided by the React library. We set a default value of "defaultValue" in case the MyContext.Provider component is not used.
In the User component, we use the “useContext” hook provided by React to consume the value of the MyContext object. We set the value variable equal to the value of MyContext using the “useContext” hook. We then render the value of MyContext in an h1 element.
Lastly, in the App component, we use MyContext.Provider component to set the value of the MyContext object to "Hello, World!". We then render a User component as a child of MyContext.Provider component.
In a similar way, you can take the value as "Hello, World!" in any of your components and render it.
A Simple React Context Example for Handling User Authentication
Well, managing the user authentication state in a React application can be a tricky task, especially when multiple components need access to this information. One solution to this problem is using the Context API, a feature in React that allows components to share data without passing props down through every level of the component tree.
So let’s take an example where we will handle user authentication with the help of Context and useState hook.
Here is the code for that,
In this code, we have used React Context to handle user authentication in a navigation bar.
The code starts by creating a UserContext using createContext and sets its default value to null. The Navigation component is then created with two props, “handleLogin”, and “handleLogout”, which will be used to handle user authentication.
The Navigation component uses the useContext hook to access the UserContext and display the user information in the navigation bar. If the user is not authenticated, the component shows a "Login/Signup" button.
Lastly, inside the App component, we have the useState hook to manage the user state. It also has two functions, “handleLogin”, and “handleLogout”, which set the user state accordingly.
And, we have done a bit of styling to make it better.
In a similar way, you can use Context inside your web app to solve the issue of prop drilling.
How to Decide the Best Approach for Your React Project
As we know, Context is designed to simplify the sharing of data across various components in your application. This feature is particularly useful when you need to pass data that can be used in multiple parts of your app, regardless of their location in the component hierarchy.
Some examples of the types of data that are suitable for React Context based on the official documentation include theme data, user data, or preferred language(user's language).
Ideally, data that does not need to be updated frequently should be stored in React Context. This approach ensures that data remains consistent throughout the application and minimizes the likelihood of data inconsistencies or conflicts.
React’s Context API works great when the codebase is modular and split into components. For this, you can use the Locofy.ai plugin to generate modular, and highly extensible React components directly from your design files.
You can use the auto layout feature on Figma to make your designs responsive on the Locofy.ai plugin and even if your designs don't utilise auto layouts, the plugin offers a Design Optimizer feature that uses AI to apply auto layouts to your design files. Once your designs are responsive, you can use the Auto Components feature to split your design elements into working React components, making them easy to extend.
If you want to learn more about how to convert your Figma or Adobe XD designs to React, React Native, HTML/CSS, Nextjs, and more, check out our docs. Or explore our solution pages for an in-depth look at how Locofy helps you build apps, websites, portfolio pages and responsive prototypes effortlessly using our low-code platform with seamless AI code generation.